
AdmitHub 2.0
AdmitHub fosters student success with mobile messaging powered by AI. AdmitHub uses chatbots to support students on the path to and through college.
OverviewCopy
AdmitHub is a chatbot service designed to provide frontline support for students on the path to and through college. Your bot responds in less than 2 seconds when it’s confident in an answer. When the bot identifies a “priority” topic or doesn’t know the answer, questions are sent to the human team. As humans answer new questions, your Knowledge Base grows, making the bot “smarter.”
AuthenticationCopy
When using the AdmitHub connector, the first thing you will need to do is go to your Tray.io account page, and select the workflow you wish to work on. Once in the workflow dashboard itself, search and drag the AdmitHub connector from the connectors panel (on the left hand side) onto your workflow.
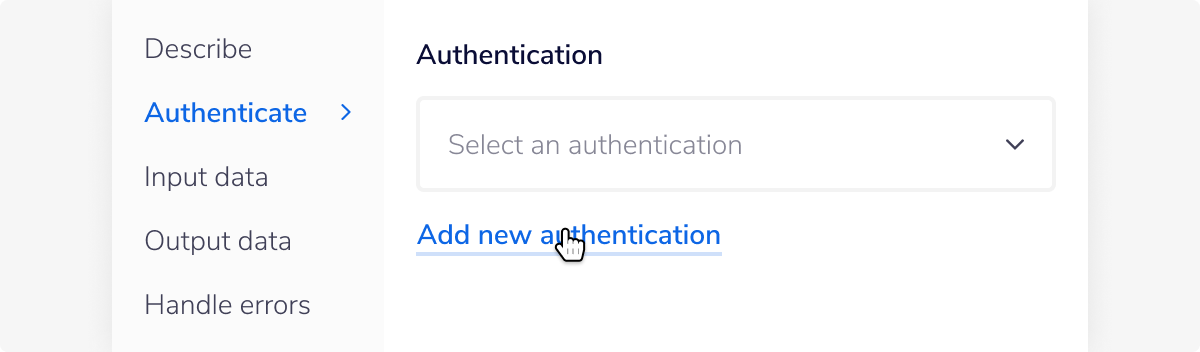
With the new AdmitHub connector step highlighted, in the properties panel on the right, click on 'New Authentication' which is located under the 'Settings' heading.

This will result in a Tray.io authentication pop-up window. The first page will ask you to name your authentication appropriately, and state which type of authentication you wish to make ('Personal' or 'Organisational').
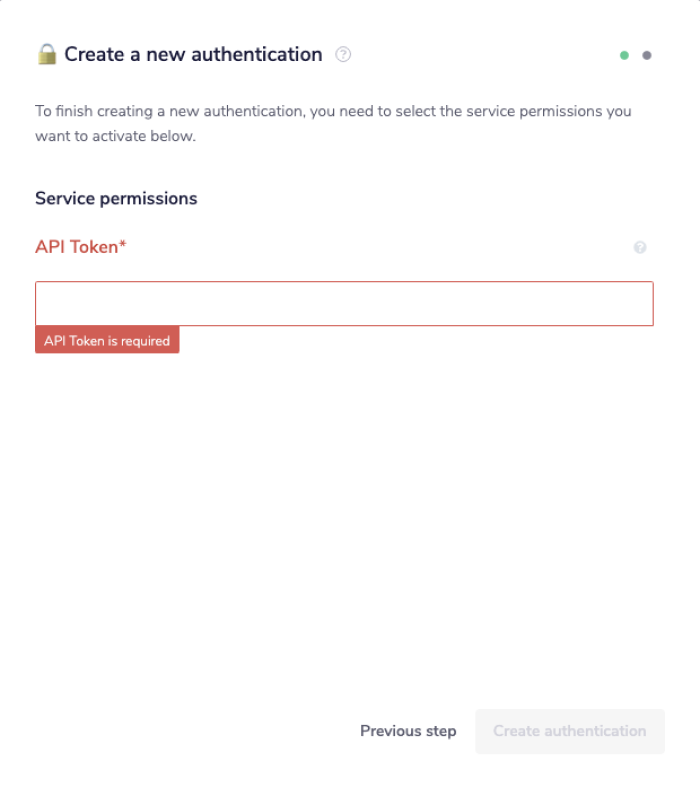
As you can see, the next page asks you for your API Token.

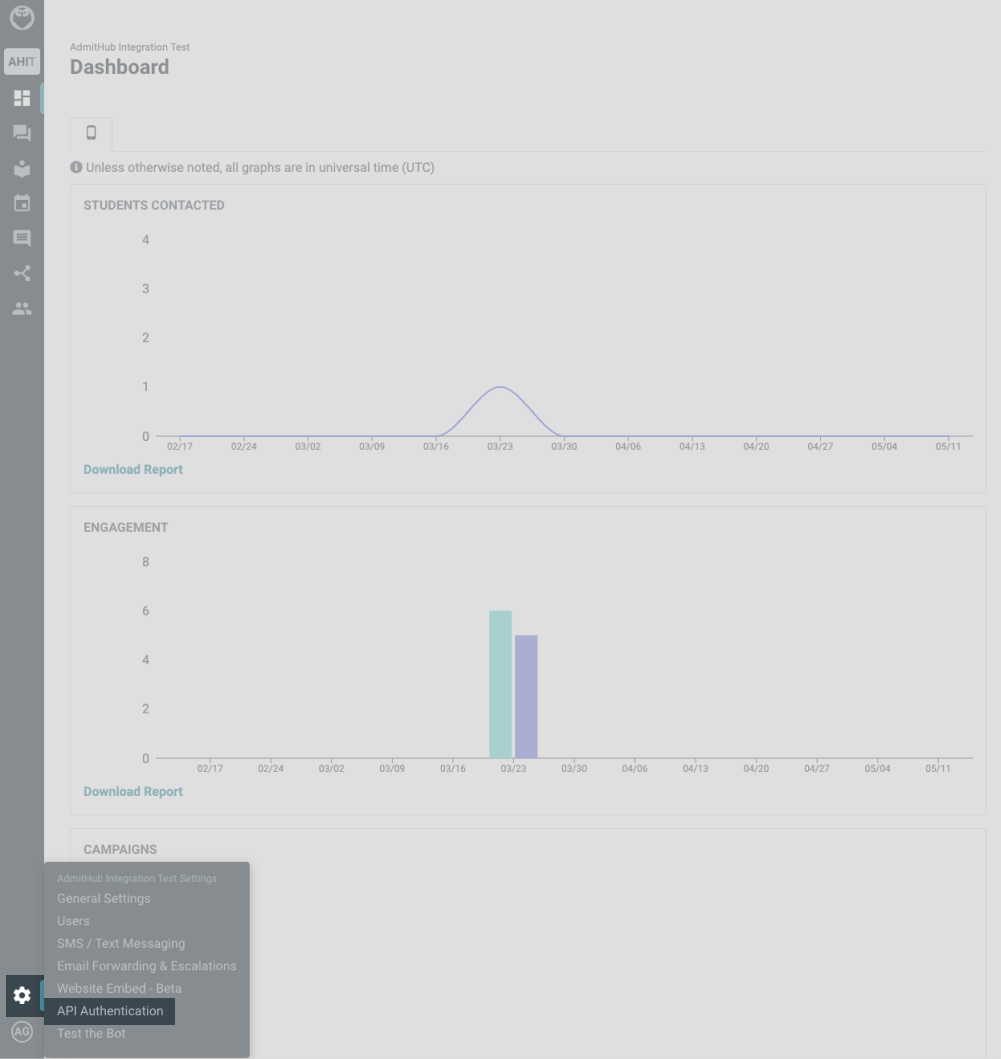
In order to get these fields, head to your AdmitHub dashboard. Click on the settings wheel in the bottom left corner and then 'API Authentication'.

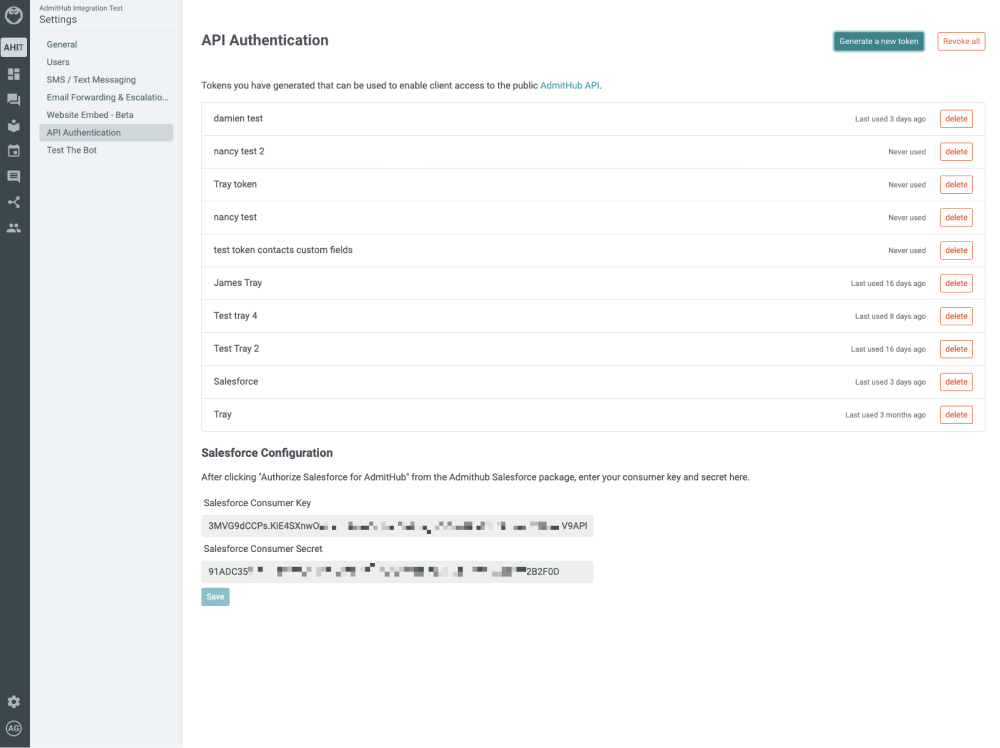
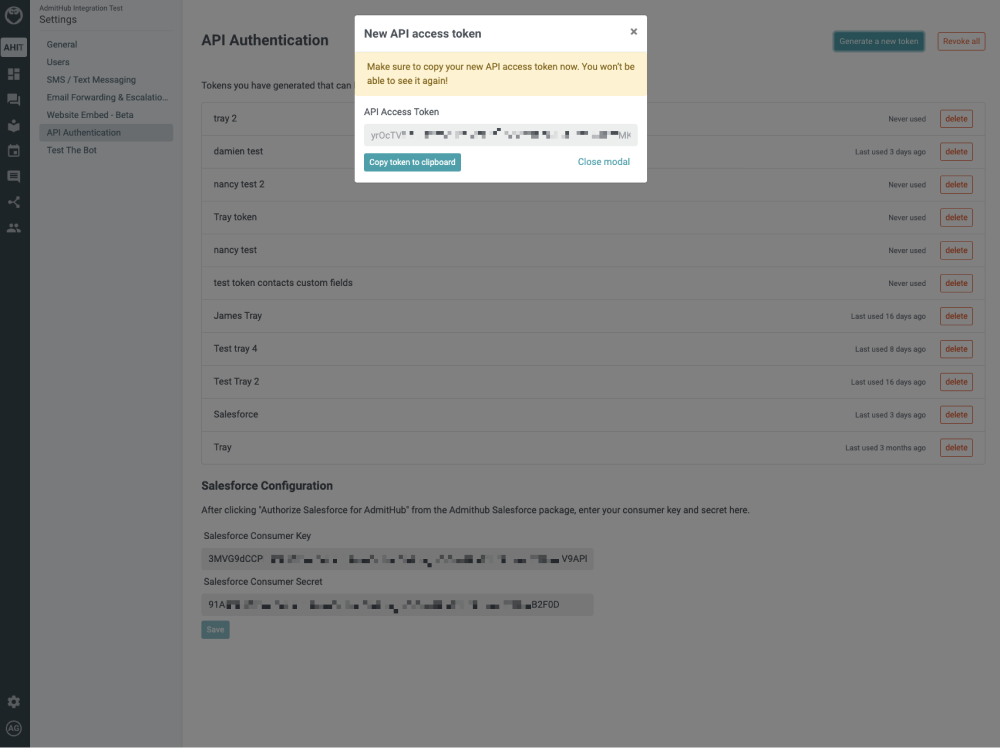
To get the API token, click 'Generate a new token' in the top right hand corner and fill in the note box that appears as a reference and click 'Create'.

A new popup will appear with the API Token. This is the only time it is shown so it needs to be copied now otherwise a new one will need to be created. Once copied, this can be pasted into the API Token input field on the Tray platform.
Once you have clicked the 'Add authentication' button, go to back to your authentication field (within the workflow dashboard properties panel from earlier), and select the recently added authentication from the dropdown options now available.
Your connector authentication setup should now be complete.
Available OperationsCopy
The examples below show one or two of the available connector operations in use.
Please see the Full Operations Reference at the end of this page for details on all available operations for this connector.
Using the Raw HTTP Request ('Universal Operation')Copy
As of version 1.0, it is possible to effectively create your own operations.
This is a very powerful feature which you can put to use when there is an endpoint in AdmitHub which is not used by any of our operations.
To use this you will first of all need to research the endpoint in the AdmitHub API documentation v1.0 , to find the exact format that AdmitHub will be expecting the endpoint to be passed in.
Note that you will only need to add the suffix to the endpoint, as the base URL will be automatically set (the base URL is picked up from the value you entered when you created your authentication).
The base URL for AdmitHub is: https://api.admithub.com
For example, say that the 'List contacts' operation did not exist in our AdmitHub connector, and you wanted to use this endpoint, you would use the AdmitHub API docs to find the 'Contact list' endpoint. Note that it is a GET request at the following URL:

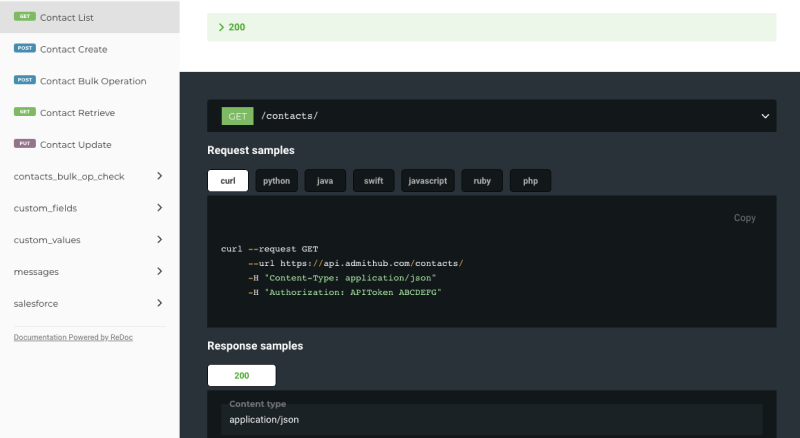
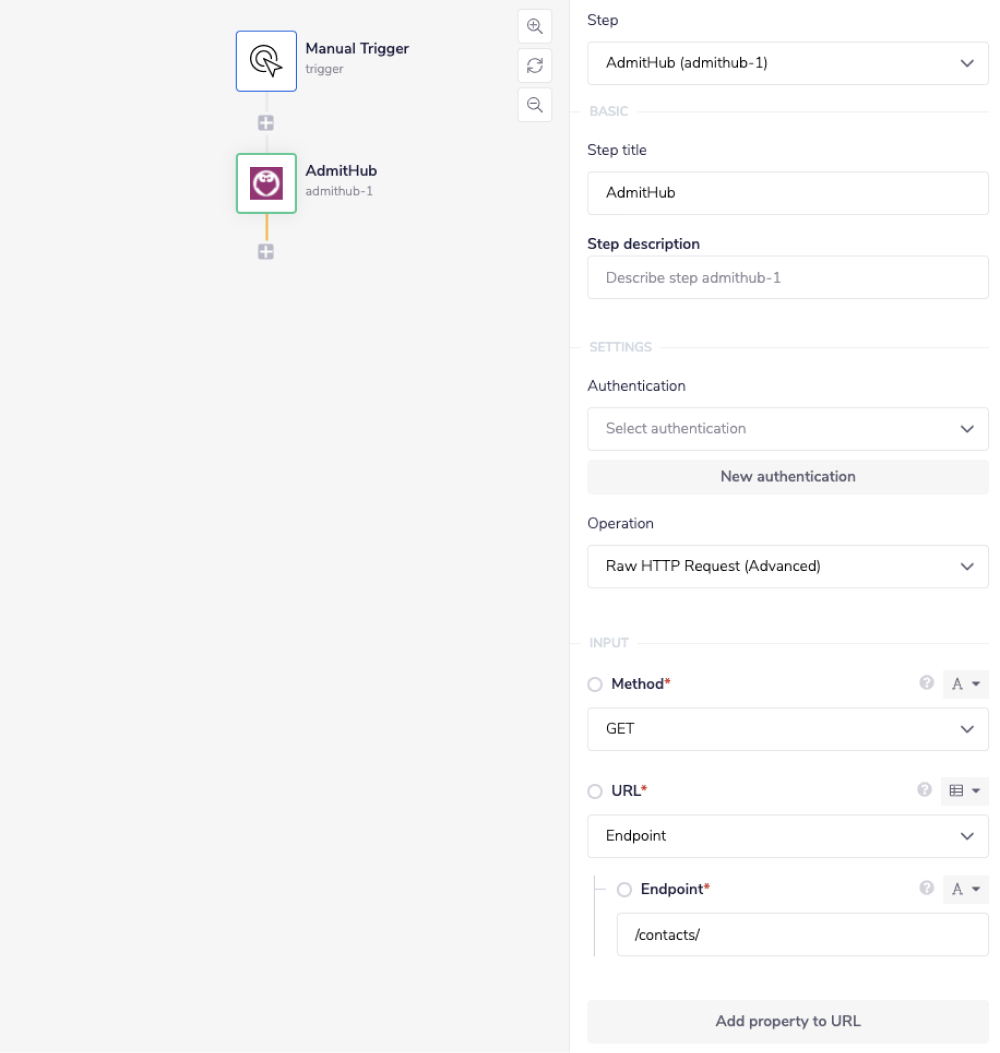
So now you can get the list of contacts with the following settings:
Method: GET
Endpoint: /contacts/
Final outcome being: https://api.admithub.com/contacts/`

As a result, this will return the list of contacts in your AdmitHub account as requested.
Example usageCopy
TRAY POTENTIAL: Tray.io is extremely flexible. By design there is no fixed way of working with it - you can pull whatever data you need from other services and work with it using our core and helper connectors. This demo which follows shows only one possible way of working with Tray.io and the AdmitHub connector. Once you've finished working through this example please see our Introduction to working with data and jsonpaths page and Data Guide for more details.
Below is an example of a way in which you could potentially use the AdmitHub connector, to send an email to all students that match a criteria.
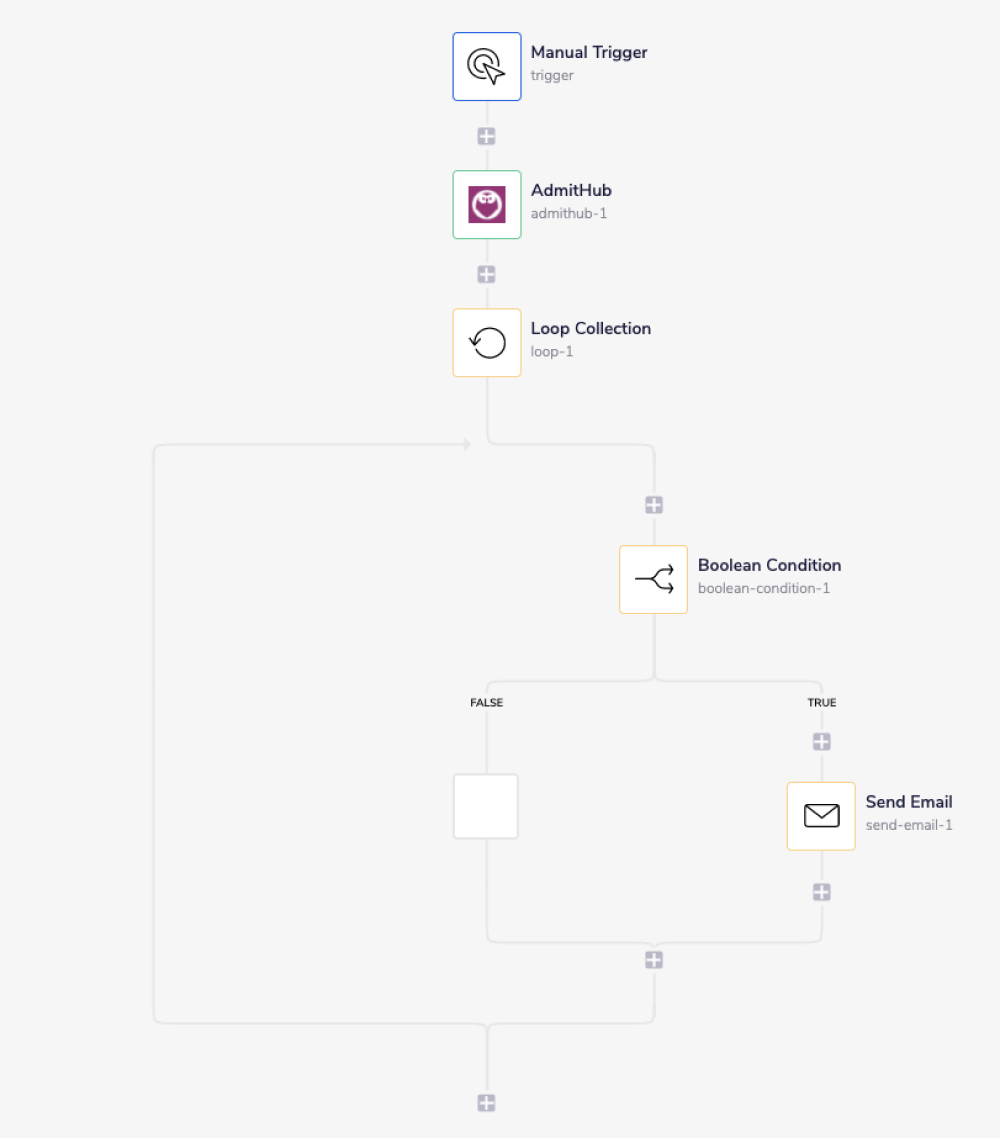
The steps will be as follows:
Create a new workflow with a manual trigger and configure a AdmitHub connector to return a list of contacts filtered by a specific criteria.
Add and configure a loop collection connector to loop through the list of contacts.
Add and configure a boolean condition connector to check whether they have an email address.
Add and configure a send email connector to send each student an email.
The final outcome should look like this:

1 - Setup Trigger & list ContactsCopy
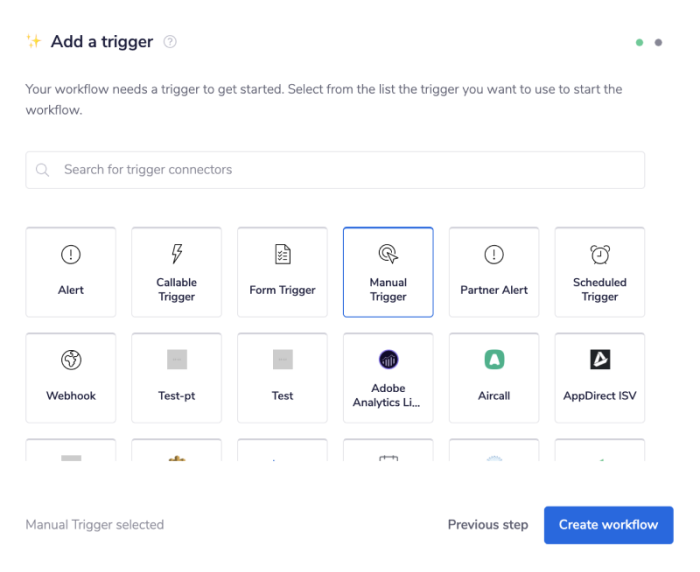
Once you have clicked 'Create new workflow' on your main Tray.io dashboard (and named said new workflow), select the Manual trigger from the trigger options available:

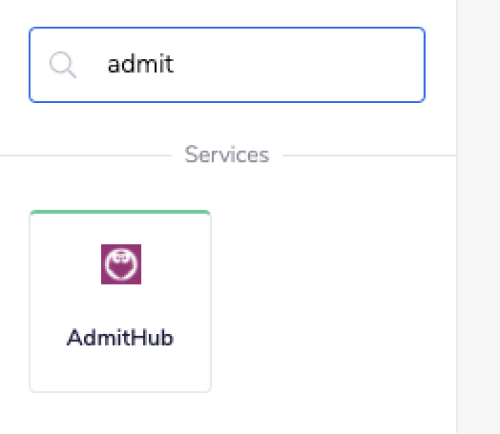
Once you're in the workflow builder dashboard, drop in an AdmitHub connector. Search the connector panel on the left by name for the AdmitHub connector (displayed in the image below).

Once the connector is added to the workflow, in the workflow builder click on the AdmitHub step you created. Once highlighted, the input panel for this step will appear on the right hand side of the workflow builder.
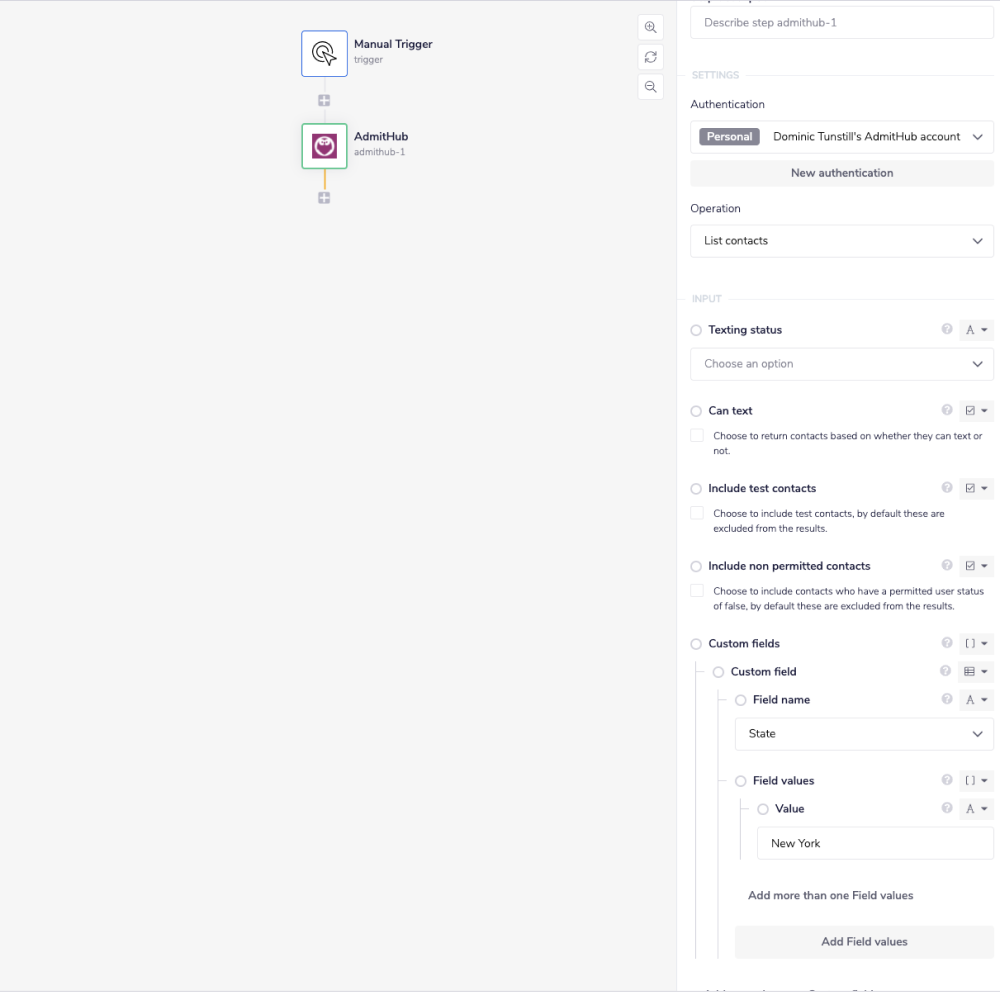
Set the operation to 'List contacts'. As you can see there are several field options available for you to use if you so wish. In our example, we are going to create a header which will filter by our custom field.
In our example AdmitHub account, the custom field is called 'State'.
Select the greyed out 'Add custom field' button below the 'Custom fields' input option within the properties panel. Select the field name from the dropdown options available. Now click on the greyed out 'Add value' button. In this case we want to return all contacts with their state set to 'New York'. Our first AdminHub connector step should now looks like this:

2 - Loop through Contact ListCopy
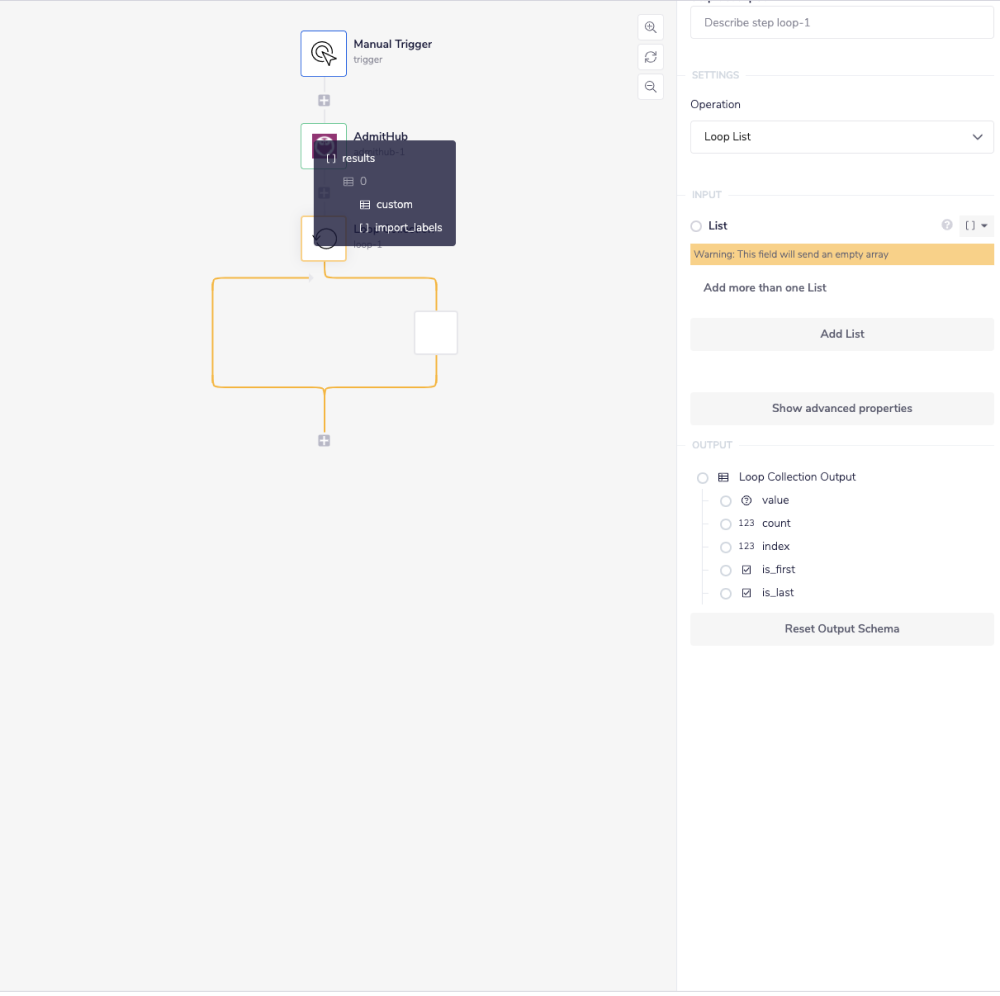
The next step is to add and configure a Loop collection connector, in order to go through each one of the customers individually. Drag and drop a Loop collection connector into your workflow. Set the operation to 'Loop List'.
Again once the connector is added to the workflow, in the workflow builder click on the Loop collection step you created to reveal the properties panel for that step. Now using the connector-snake, drag your mouse from the 'List' input (within your operation) over to the previous AdmitHub step.
CONNECTOR-SNAKE: The simplest and easiest way to generate your jsonpaths is to use our feature called the Connector-snake. Please see the main page for more details.

A grey box should appear as a result of hovering over said connector, which will give you a list of options that you can loop through. Select 'results' from said list. This will now auto-generate the jsonpath of the list input, for the Loop collection. The results being displayed in the 'List' input field
JSONPATHS: For more information on what jsonpaths are and how to use jsonpaths with Tray.io, please see our pages on Basic data concepts and Mapping data between steps
3 - Has Email Address?Copy
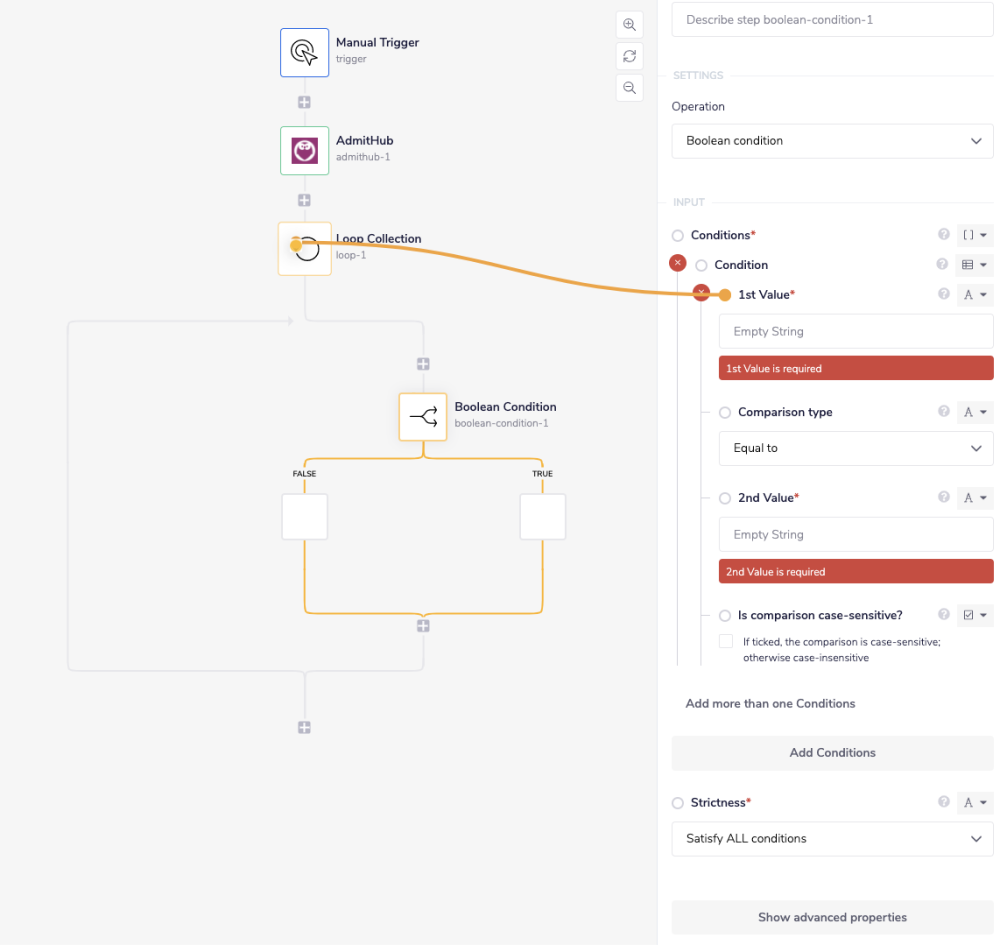
The next step is check whether each contact has an email address. Search for and drop in a Boolean Condition connector, so that it is WITHIN the loop step of the workflow itself. Set the operation to 'Boolean condition'.
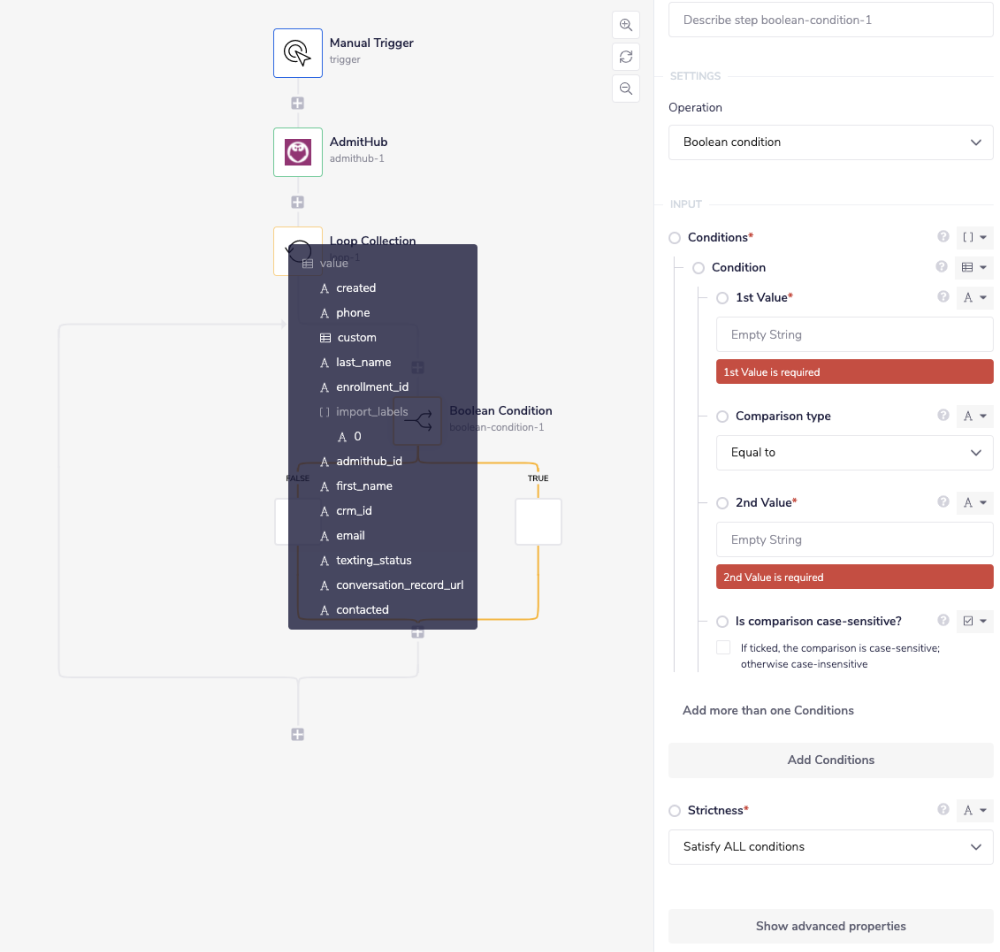
Within the 'First Value' field, use the connector-snake once more to generate a jsonpath from the Loop connector step previously:

This time select value -> email as your desired outcome. It should look similar to this: $.steps.loop-1.value.email.

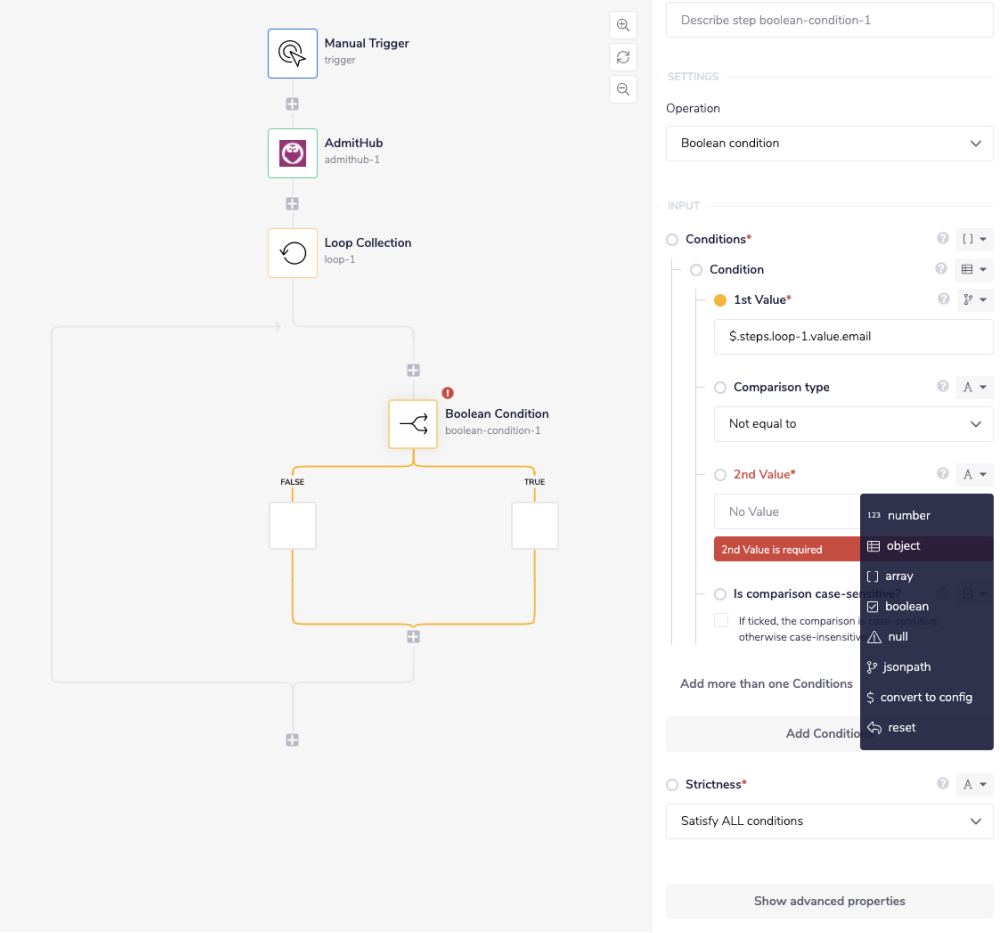
Next change the 'Comparison type' to 'Not equal to'. This will return true if email does not equal the '2nd value'.
Finally change the '2nd value' data type to 'null'. Do this by clicking the 'A' symbol to the right hand of the '2nd value' input box, and selecting 'null' from the options that appear.

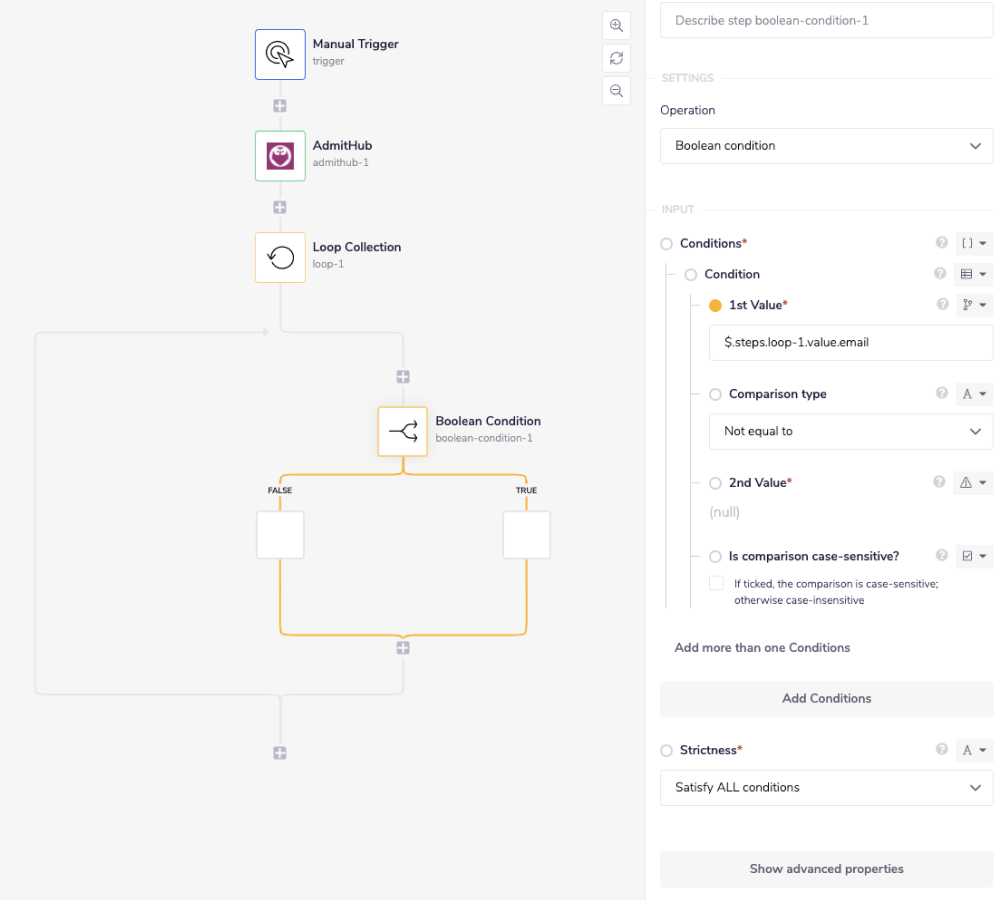
This means that if the contact does not have an email address in the system, the boolean condition will return false as the email field for that contact is equal to null.
The step should look like this once completed:

4 - Send EmailCopy
The final step is to add and configure the 'Send Email' connector. Search for and drop in said connector within the "TRUE" branch of the Boolean condition step. Set the operation to 'Send email'.
Click on the greyed out 'Add Recipients' button. Drag the connector-snake from the 'Email' input over to the Loop collection step, and select 'email' from the grey box once more.

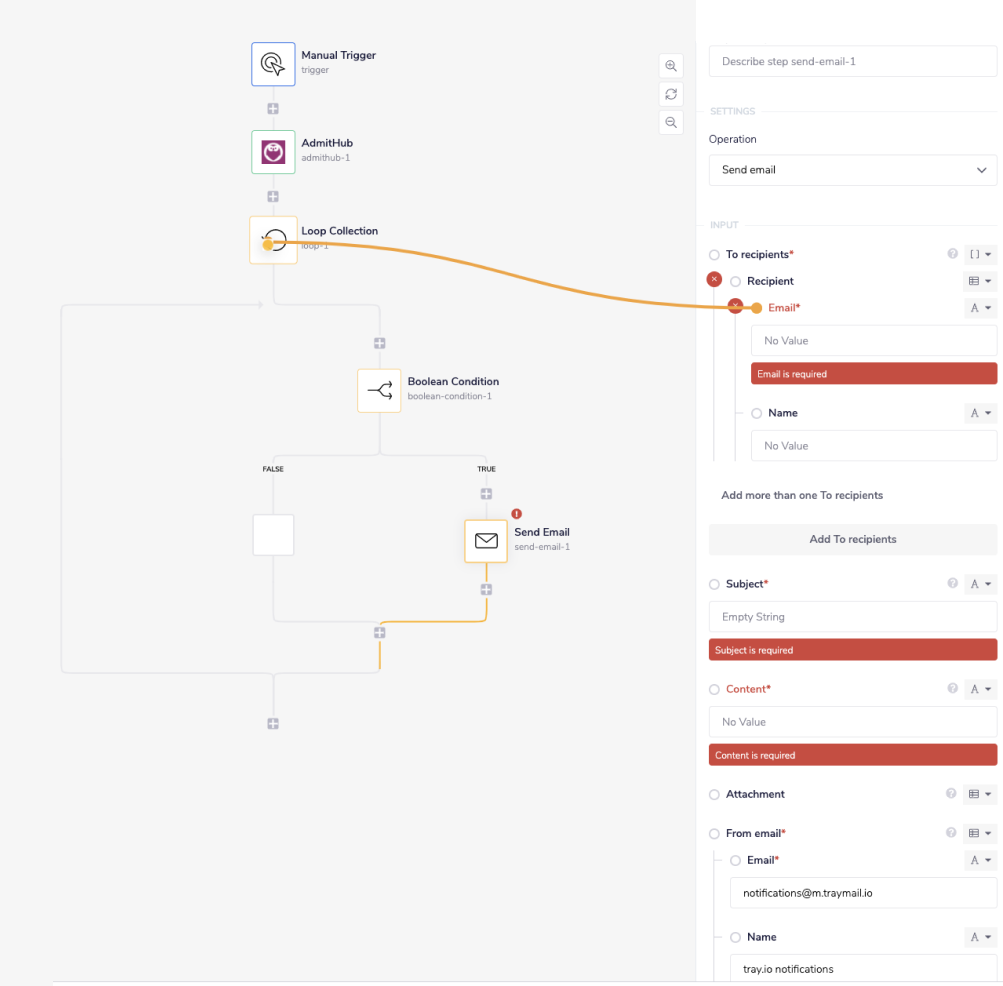
Finally add a 'subject' and 'content' in the input panel to finish configuring the operation. The final configuration should look something like this.

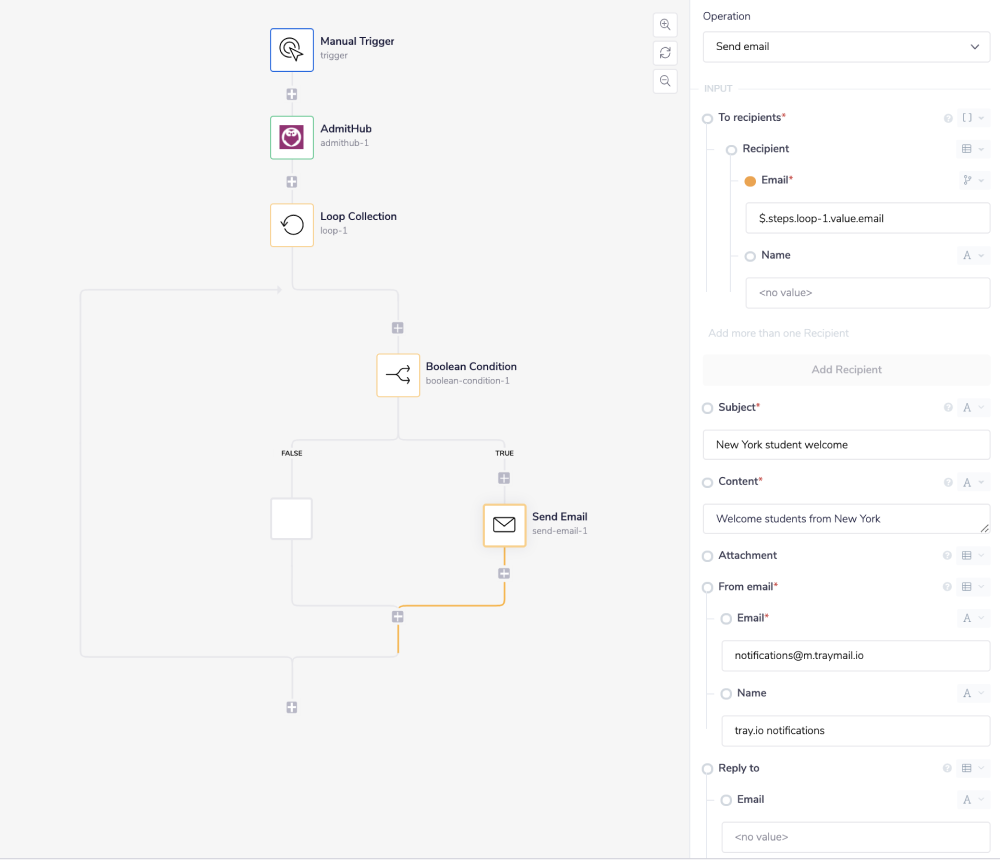
Once the operation is fully configured, the workflow is setup and ready to go! You can now click 'Run workflow'.
Check the output in the 'Debug' panel to see the result of the workflow. If the step executes correctly, AdmitHub will return a list of contacts matching the criteria, check whether they have an email in the system and send each one that does an email. All steps within the 'Debug' panel should show as green.
BEST PRACTICES: Whenever you do decide to create your own workflow, be sure to check out some of our key articles such as: