
ActiveCampaign 2.2
ActiveCampaign is a customer experience automation platform that helps businesses connect and engage with their customers.
- On this page
- ActiveCampaign
- Overview
- Authentication
OverviewCopy
The ActiveCampaign connector helps businesses to manage contacts and automation campaigns.
AuthenticationCopy
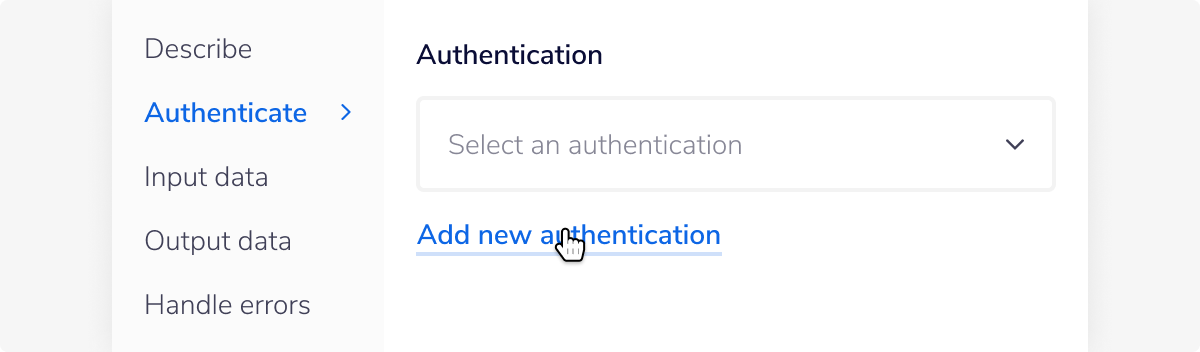
When using the ActiveCampaign connector, the first thing you will need to do is go to your Tray.io account page and select the workflow you wish to work on. Once in the workflow builder itself, search and drag the ActiveCampaign connector from the connectors panel (on the left-hand side) onto your workflow.
With the new ActiveCampaign connector step highlighted, in the properties panel on the right, click on the Authenticate tab and 'Add new authentication' (located under the 'Authentication' field).

This will result in a Tray.io authentication pop-up window. The first page will ask you to name your authentication and state which type of authentication you wish to create ('Personal' or 'Organisational').
As you can see, the next page asks you for your 'URL' and 'API Key'.

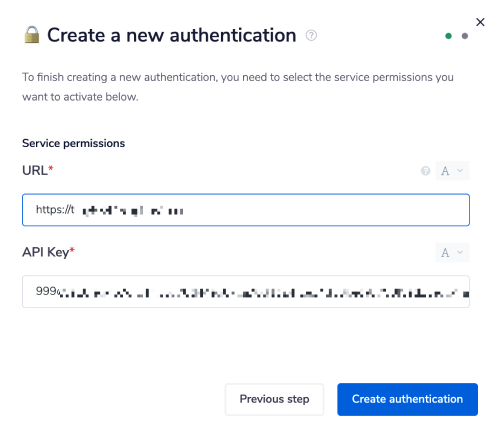
In order to get these fields, head to your ActiveCampaign account and sign in. Navigate to Settings > Developer tab.
From the 'Developer Settings' page (as shown in the image below), you can copy and paste the 'URL' and 'API Key' on the Tray platform's authentication window.


Once done, click on the 'Create authentication' button. Go back to your settings authentication field (within the workflow builder properties panel), and select the recently added authentication from the dropdown options now available.
Your connector authentication setup should now be complete.