
XML Helper 2.3
Convert your XML data into JSON and vis versa with ease using the XML Helper
- On this page
- XML Helper
- Overview
- Basic use case
- Operations
OverviewCopy
The XML Helper can be used to convert XML data into a more manageable JSON format. This output can then in turn be used to extract information via the use of jsonpaths, and used in conjunction with other connectors. It can also be used to convert JSON data into XML format easily.
Basic use caseCopy
A common scenario where you might use the XML Helper is when a user has data coming in sent in XML format by a third-party service, that needs to be added to a secondary service which is not XML compatible.
This example uses Google sheets as well as the Loop connector to explain the XML Helper operations in more detail.
OperationsCopy
Convert XML to JSONCopy
Description: Takes XML as an input and converts to JSON.
IMPORTANT!: Once the XML is converted into a JSON format, the result will be a large JSON object. Please check your workflows are built with this in mind, as most connector output results are arrays, or arrays of objects.
This operation is essentially a format converter. This particular operation is most useful when users need to manipulate XML data within their Tray.io workflows, as Tray.io works off the premise of jsonpaths.
New data from a third-party service is coming into the workflow in an XML format. This is where the Convert XML to JSON operation comes in useful.


Set the XML Helper connector operation to 'Convert XML to JSON' and the 'XML to parse' field to the trigger's output. Add a 'Loop' connector as your next step to iterate through the object itself.
Usually the Loop connector iterates through lists, but it is not possible with this setup. Therefore make sure to set your Loop operation to Loop object before continuing. This will result in a list like output, which users can then iterate through to manipulate their data as desired.

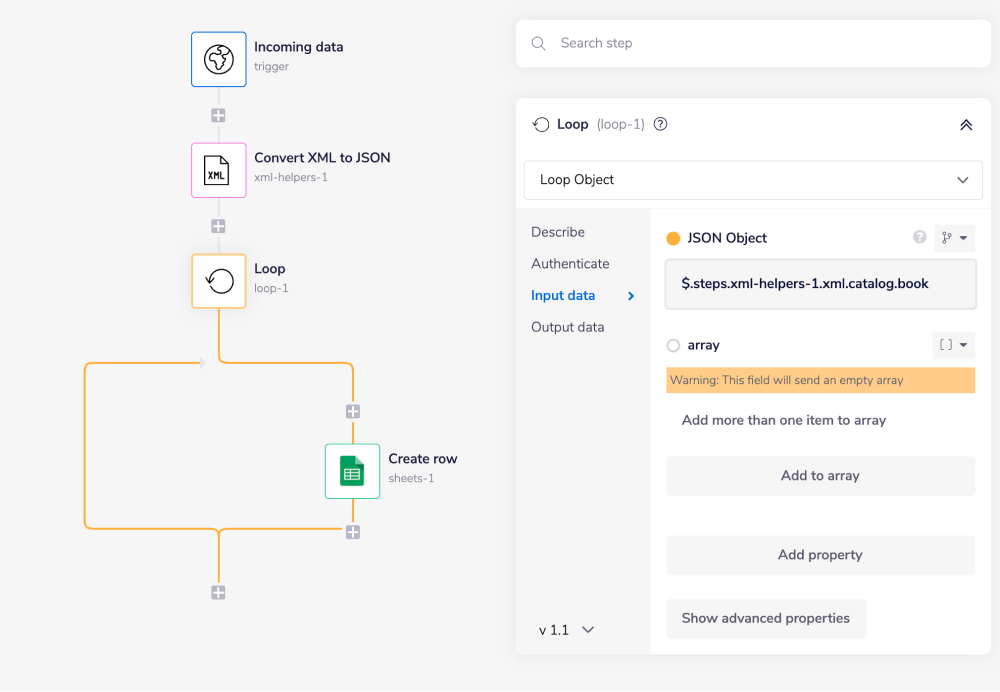
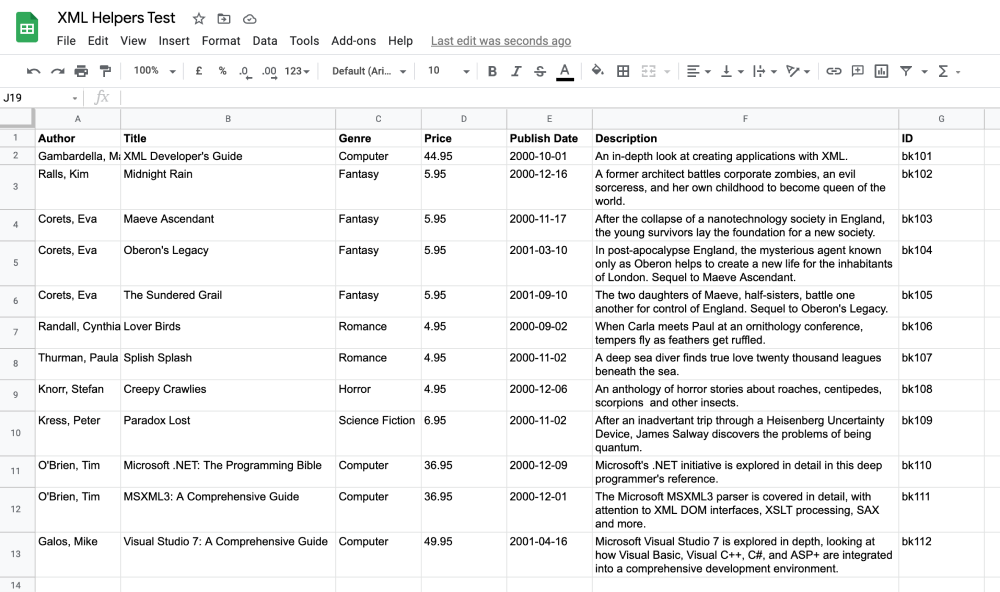
In this case, a simple Google sheets 'Create row' operation was used to import the data into a spreadsheet.

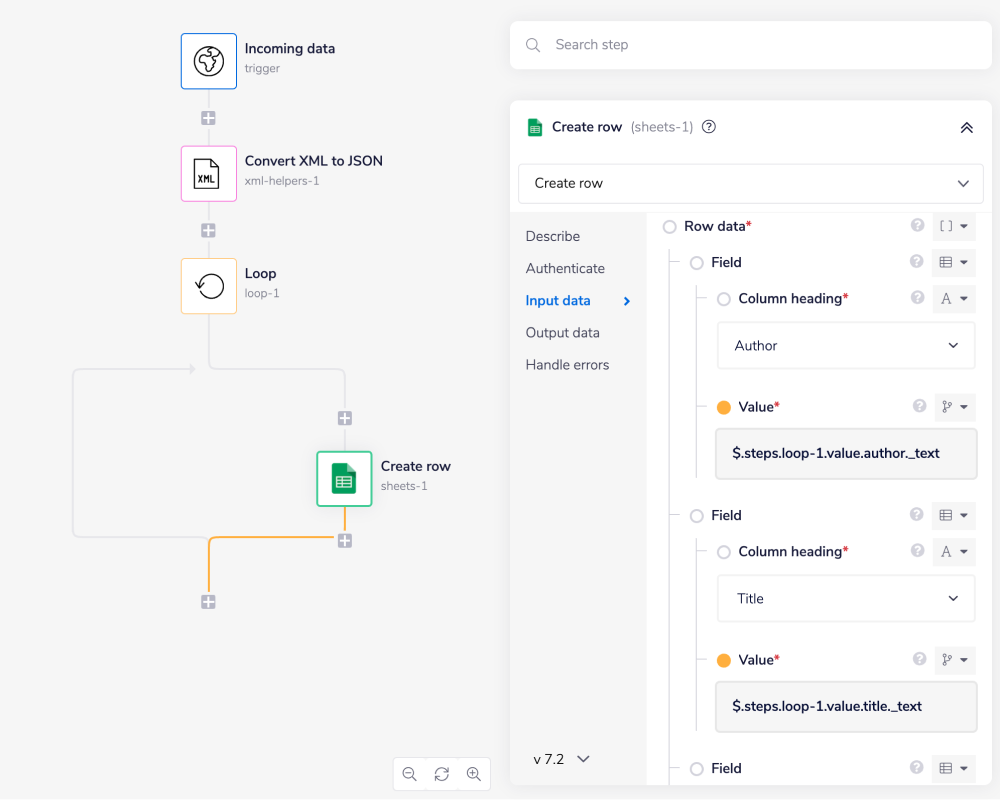
The end result as seen below:

Convert JSON to XMLCopy
Description: Takes JSON as an input and converts to XML.
This operation is essentially a format converter. It is most useful when users need to convert their JSON data into an XML format so that third- party service can use the data accordingly.
Note that when the data is returned, it will be returned as a single entry/ line. This means that further formatting may be required by end users.
See the below images for more details.


Adding AttributesCopy
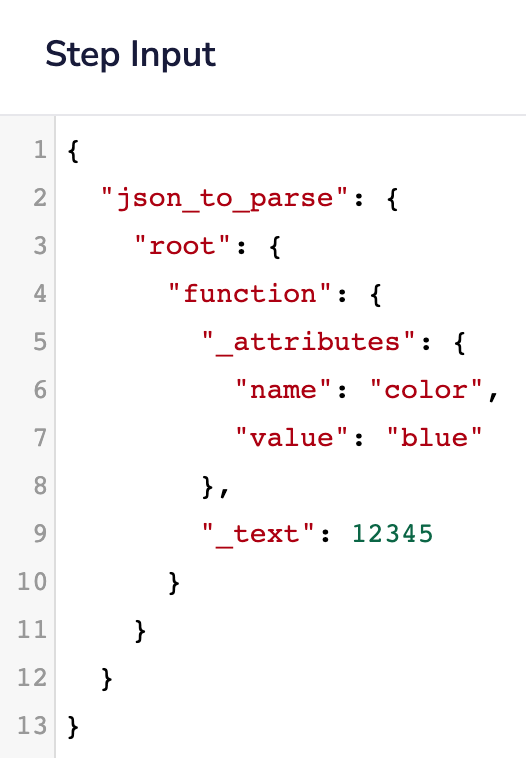
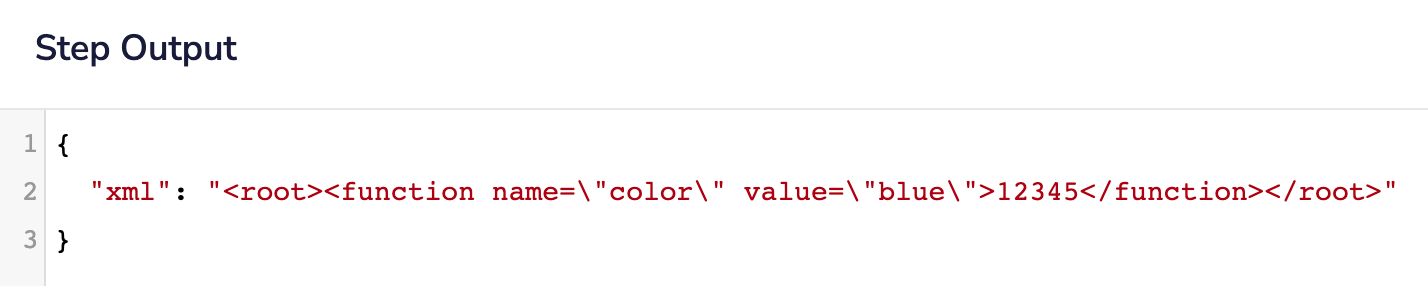
If you format the JSON correctly, there is a way for you to convert and include attributes.
In this case, _attributes and _text are specific JSON object values that the connector recognizes to parse into XML, in a specific format:
1exports.step = function(input, fileInput) {2return {3root: {4function: {5"_attributes": {6name: "color",7value: "blue"8},9"_text": 1234510}11}12};13};
With the help of the Javascript connector, the code above can be used to the create the following results:


Example usageCopy
In this example we show you how to use the Paginate XML File operation. Imagine a scenario where you have an XML file that has thousands of information on feeds. The file that we are processing might look something like this:
1<?xml version="1.0" encoding="UTF-8" ?>2<root>3<feeds>4<id>2140</id>5<title>gj</title>6<description>ghj</description>7<location>Hermannplatz 5-6, 10967 Berlin, Germany</location>8<userId>4051</userId>9<name>manoj</name>10<isdeleted>false</isdeleted>11<profilePicture>Images/9b291404-bc2e-4806-88c5-08d29e65a5ad.png</profilePicture>12<videoUrl/>13<images/>14<mediatype>0</mediatype>15<imagePaths/>16<feedsComment/>17<commentCount>0</commentCount>18<multiMedia>19<id>3240</id>20<name></name>21<description/>22<url>http://www.youtube.com/embed/mPhboJR0Llc</url>23<mediatype>2</mediatype>24<likeCount>0</likeCount>25<place/>26<createAt>0001-01-01T00:00:00</createAt>27</multiMedia>28<likeDislike>29<likes>0</likes>30<likes>2</likes>31<likes>4</likes>32<dislikes>0</dislikes>33<userAction>2</userAction>34</likeDislike>35<createdAt>2020-01-02T13:32:16.7480006</createdAt>36<code>0</code>37<msg/>38</feeds>39<feeds>40<id>2139</id>41<title>dfg</title>42<description>df</description>43<location>443 N Rodeo Dr, Beverly Hills, CA 90210, USA</location>44....45</feeds>46</root>
To paginate this file the steps will be as follows:
Set up your trigger and download a large XML file.
Paginate the XML file.
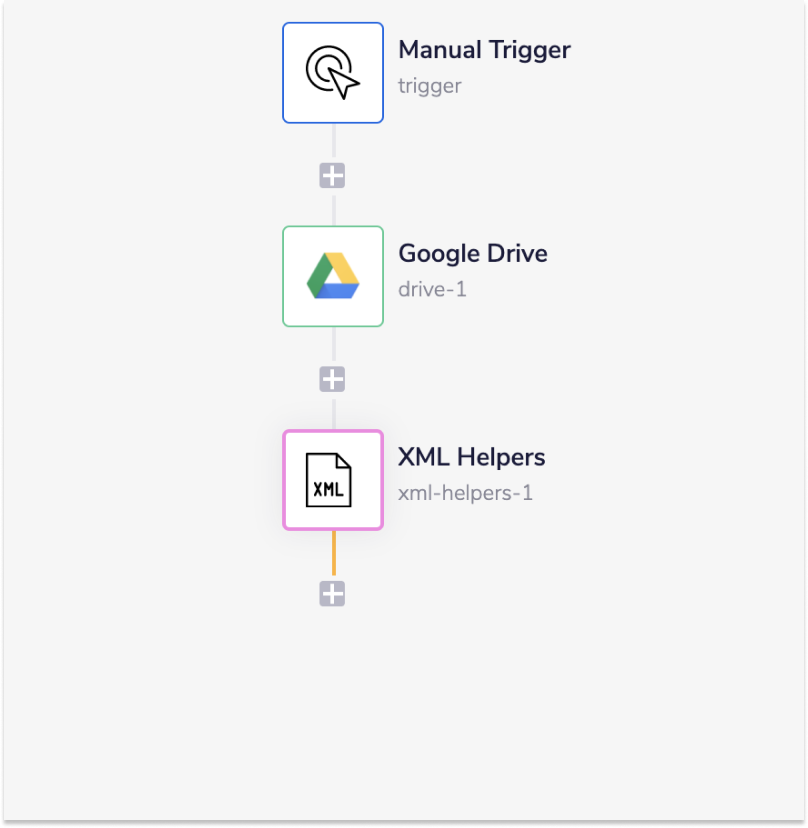
The complete workflow will look something like this:

1 - Setup and download the XML fileCopy
First go to your Tray.io dashboard, click on the 'Create new workflow' button in the top right corner, and name your project workflow. Select 'Manual' as your trigger. Your operation should automatically be set to 'trigger'.


We then need to get our XML file object into the workflow. For this example we are going to download our file from Google Drive.
Once redirected to the workflow dashboard, select the 'Google Drive' connector from the connector panel (on the left-hand side). Place it on the next step of your workflow.
Make sure your operation is set to 'Download file'. Then select or create an authentication and add the Google Drive 'File ID' of the XML file in the input panel.
The data we are testing can be found here.


2 - Paginate the XML fileCopy
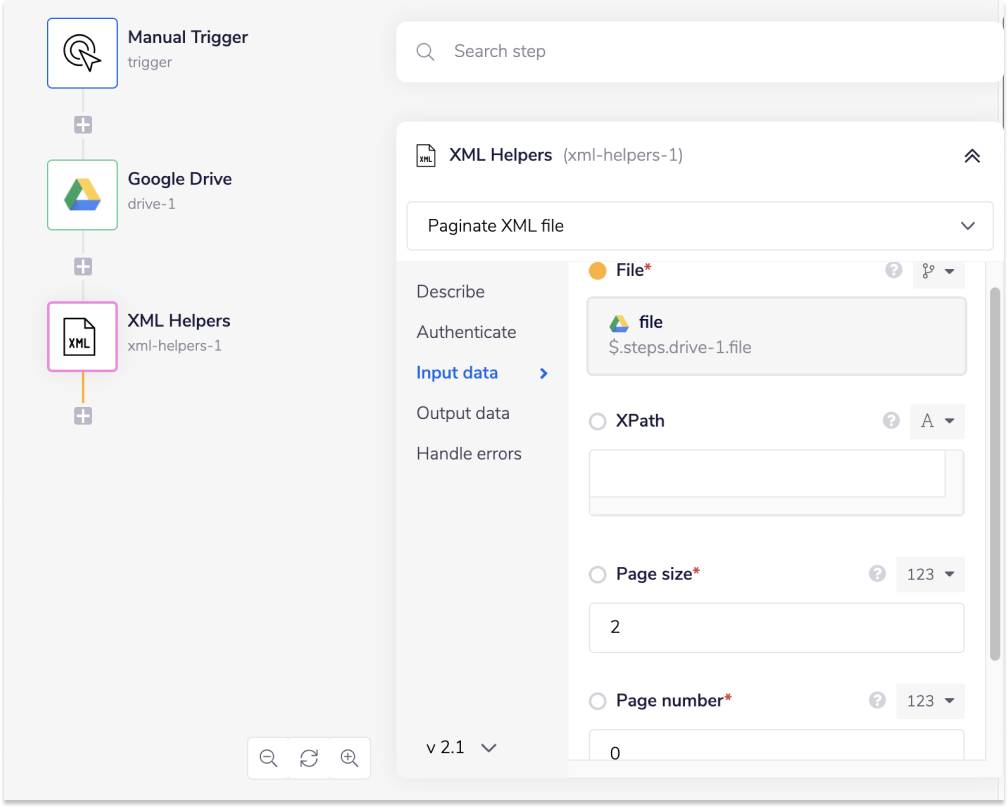
Next you will need to add the 'XML Helpers' connector to your loop step. Make sure the operation is set to 'Paginate XML'.
Use the connector-snake to auto-generate your JSON path for the 'File' input field.
Your 'Page size' will have 10 displayed which we have changed this to 2 for the sake of our demo. We will leave the page number as 0 which will return the first two results.
Using the XPath input, we can also paginate a particular element rather than the root element. So for example if we wanted to paginate the 'multiMedia' of the first 'feeds' entry, we could provide a 'XPath' value of /root/feeds[1]/multimedia.
This selects the first 'feeds' element and then selects the 'multiMedia' element within the feed. This will now paginate and return elements from within this element. So with our pagination setup here, this will return the first two elements; '
<Content type in custom component id TBD>
' and '
<Content type in custom component name TBD>
'.
For our example we want to paginate the root element and return the first two 'feeds' elements so we will leave 'XPath' blank.
Setup should now be complete. If you run the workflow and then click 'Debug' we cam see the resultant paginated XML string.

