
Encryption Helper 1.3
The Encryption Helper will helper you encrypt and decrypt messages and files using private / public key pairs
OverviewCopy
The encryption helper allows you to encrypt and decrypt messages and files using private / public key pairs.
Remember that the model for public/private key encryption is that you must have someone's public key in order to encrypt a message for them. Then, in order to decrypt your message, they must have the private key which is paired with their public key. So:
If you want to encrypt a message to Alice, you encrypt it using Alice's public key, and she decrypts it with her private key.
If Alice wants to send you a message, she encrypts it using your public key, and you decrypt it with your private key.
This guide will take you through encrypting and sending a message to someone, and using the Tray encryption helper to decrypt it.
PLEASE NOTE: For gpg encrypted messages to be decrypted in Tray, armoring must be used, asillustrated in the examples below. Please also see note on armoring in the final Full OperationsReference section of this guide.
AuthenticationCopy
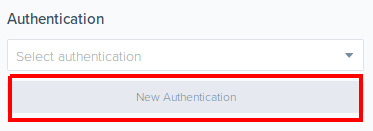
When using the encryption helper, the first thing you will have to do is click on 'New Authentication' in the step editor:

The authentication consists of three properties: Private key, Passphrase and Public key.
Detailed instructions on the encryption helper authentication can be found in step 6 of Example 1 below.
OperationsCopy
PGP encrypt
PGP decrypt
Example 1: Encryption with GPG command line toolCopy
The following example encrypts a file using the GPG command line tool and decrypts the encrypted file in a Tray workflow. It assumes you already have GPG installed.
1. Set up GPG keys (Message receiver)Copy
To begin using GPG to encrypt your messages, you need to create a key pair. You can do this by issuing the following command in the command line:
1$ gpg --full-generate-key
This will take you through a few questions that will configure your keys:
Please select what kind of key you want: (1) RSA and RSA (default)
What key size do you want? 4096
Key is valid for? 1y (expires after 1 year)
Is this correct? y
Real name: your real name here
Email address: your_email@address.com
Comment: Optional comment that will be visible in your signature
Change (N)ame, (C)omment, (E)mail or (O)kay/(Q)uit? O
Enter passphrase: Enter a secure passphrase here (upper & lower case, digits, symbols)
At this point, gpg will generate the keys using entropy. Entropy describes the amount of unpredictability and nondeterminism that exists in a system. GPG needs this entropy to generate a secure set of keys.
2. Export the recipient's public key (Message sender)Copy
This only needs to be done if the receiver has several keys registered in GPG, and only for the first time an encrypted message is sent between two parties. It will ensure the receiver can correctly configure their Tray workflow to decrypt the message.
Export the public key of the receiver by issuing
1$ gpg --armor --export receiver_email@address.com
This will output the public key. Send this key to the receiver to enable them to identify which key was used to encrypt the message.
If no key is found for the user, you will need to import the public key for the user. Ask the receiver to send you their public key. Once you have received the public key, import it to gpg by issuing:
1$ gpg --import /path/to/public/key/file
If this step is required, then it is likely the message sender knows which public key is being used to encrypt the file, so it is not necessary to then export their public key.
3. Encrypt the file (Message sender)Copy
Issue the following command to encrypt the file:
1$ gpg --encrypt --sign --armor -r receiver_email@address.com /path/to/file
where /path/to/file is the file to be encrypted. This encrypts the message using the recipient's public key, signs it with your own private key to guarantee that it is coming from you, and outputs the message in a text format instead of raw bytes. The filename will be the same as the input filename, but with an .asc extension.
You can now send the encrypted file to the recipient.
4. Identify which private/ public key pair is relevant (Message receiver)Copy
List your public keys by issuing the following command:
1$ gpg --list-keys
This should output something similar to:
1pub rsa4096 2018-10-08 [SC] [expires: 2034-10-04]2311B1F843uid [ unknown] Test User <test.user@address.com>4sub rsa4096 2018-10-08 [E] [expires: 2034-10-04]
The key ID is the value on the second line in this snippet. For each public key outputted, look at the contents of the key and compare to the public key the Message sender has used for encryption and sent you in step 2 above. View the public key by issuing the following command:
1$ gpg --armor --export key_id
where key_id is the key ID from the output above.
5. Export the private key (Message receiver)Copy
When you have found the public key that matches the one used to encrypt the message, export the corresponding private key by issuing the command:
1$ gpg --export-secret-keys --armor key_id
Copy the key into the Private key part of the authentication in Tray as well as the corresponding passphrase.
If you have forgotten the passphrase for the private key, you can run the following commands:
1$ gpg --edit-key key_id2gpg> passwd
then enter a new passphrase twice, followed by
1gpg> save
6. Build a Tray workflow to decrypt the file (Message receiver)Copy
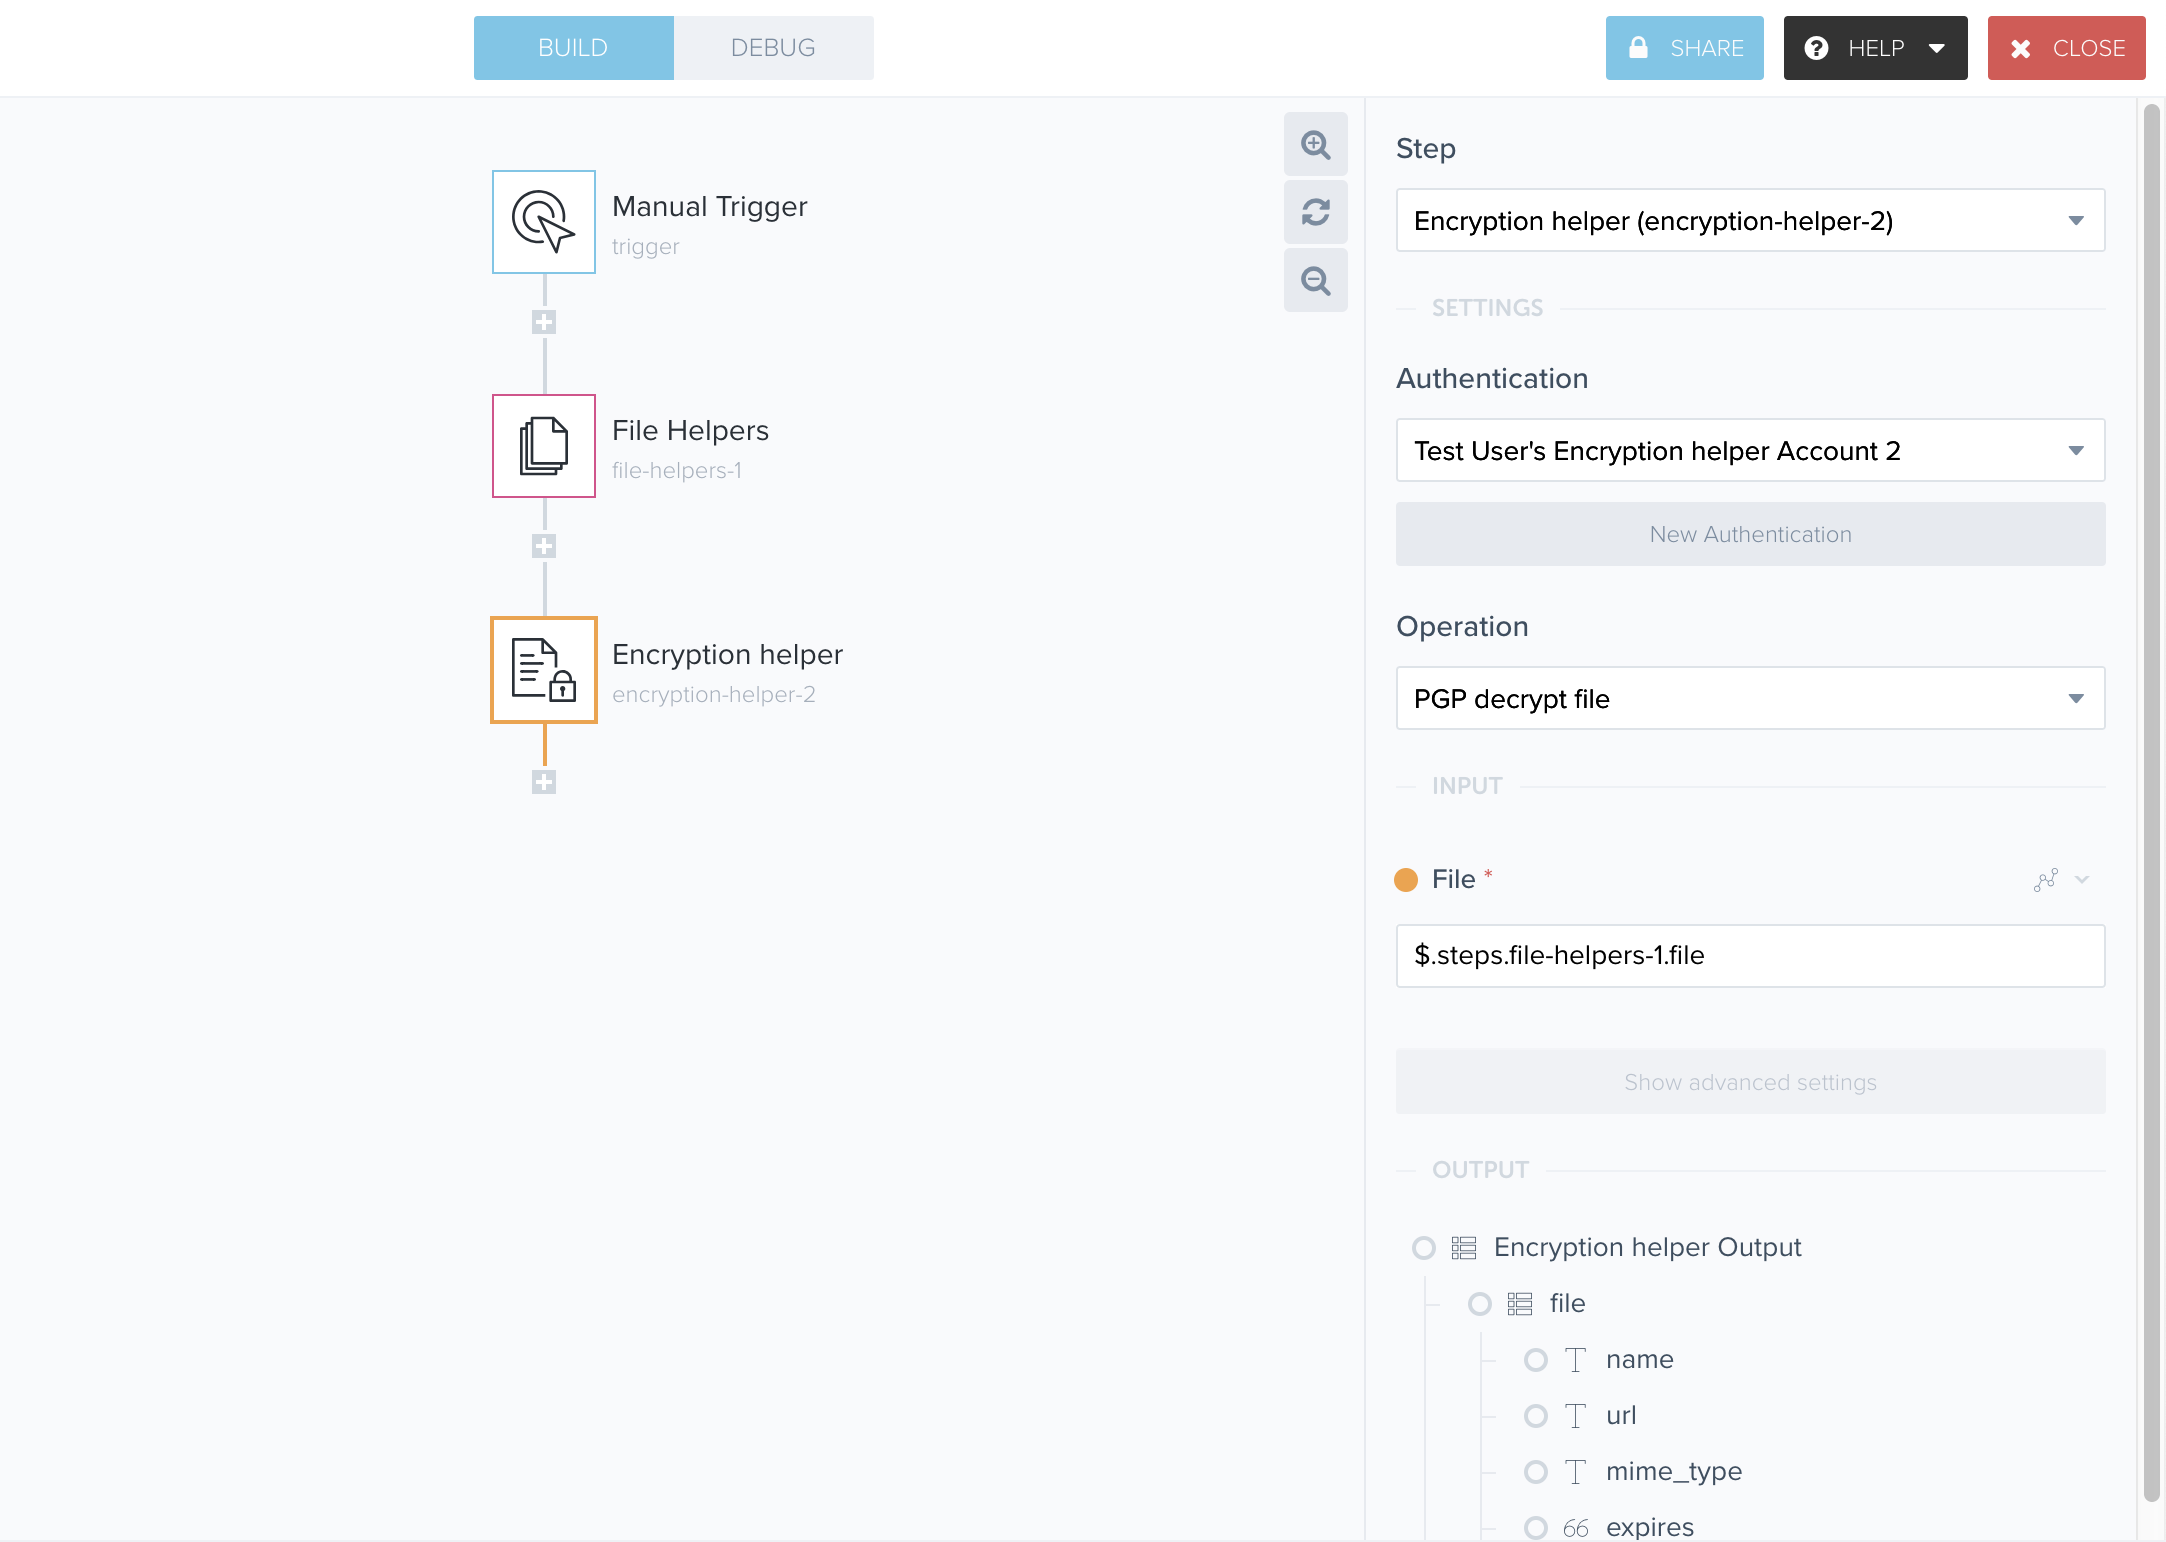
Create a workflow with a Manual trigger, a File helpers step set to the Create file from Content operation, and an Encryption helper step, set to the PGP decrypt operation (note that here you could also use the FTP Client to import an encrypted file via FTP. This is shown below, towards the end of the Keybase example).
You will first need to click on 'New Authentication' in the step editor for the encryption helper, in order to add your public and private key pair (remember you can find these using the gpg --list-keys gpg --armor --export and gpg --export-secret-keys commands detailed in steps 4 and 5 above:
The Private key should be of the form:
1-----BEGIN PGP PRIVATE KEY BLOCK-----2...3-----END PGP PRIVATE KEY BLOCK-----
The Public key should be of the form:
1-----BEGIN PGP PUBLIC KEY BLOCK-----2...3-----END PGP PUBLIC KEY BLOCK-----
For both, ensure you include the -----BEGIN PGP PUBLIC/PRIVATE KEY BLOCK----- header and the -----END PGP PUBLIC/PRIVATE KEY BLOCK----- footer, and there must be an empty line after the header , i.e.
1-----BEGIN PGP PUBLIC KEY BLOCK-----23mQINBFu7p58BEADZPFYUdsdsdvodep8=12030dlfffPcPvua+vVJZhFSgbvDiwU84+gsmpez42mYWh9sjxUD8r6zMveLfl063Oe9vLpdxlX3QocafzP/Uf87Ttc5JZHoJ57i4YBJ+yJ9SBys1CmJXo8fAn0eigu82uMvJIxmAzvTRRCkarbv5O0gn4NXSm2GBB
In the Create file from Content step, set the Name to the name of the file you received. Copy and paste the contents of the file into the Content field:


In the PGP decrypt step, set the File property to the output of the Create file from content step:
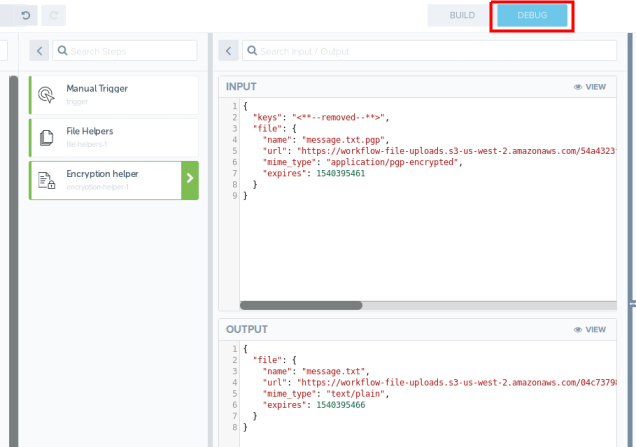
Run the workflow. The decrypted file will be output as a file to be used. You can check that the operation was successful with the 'Debug' tab:

Example 2: Encryption with KeybaseCopy
The following example encrypts a message using Keybase's web interface, uploads the encrypted file to an FTP server and decrypts the file in a Tray workflow. It assumes you already have a Keybase account with a private/ public key pair and FTP credentials.
1. Send a PGP encrypted message (Message sender)Copy
Navigate to https://keybase.io/encrypt.
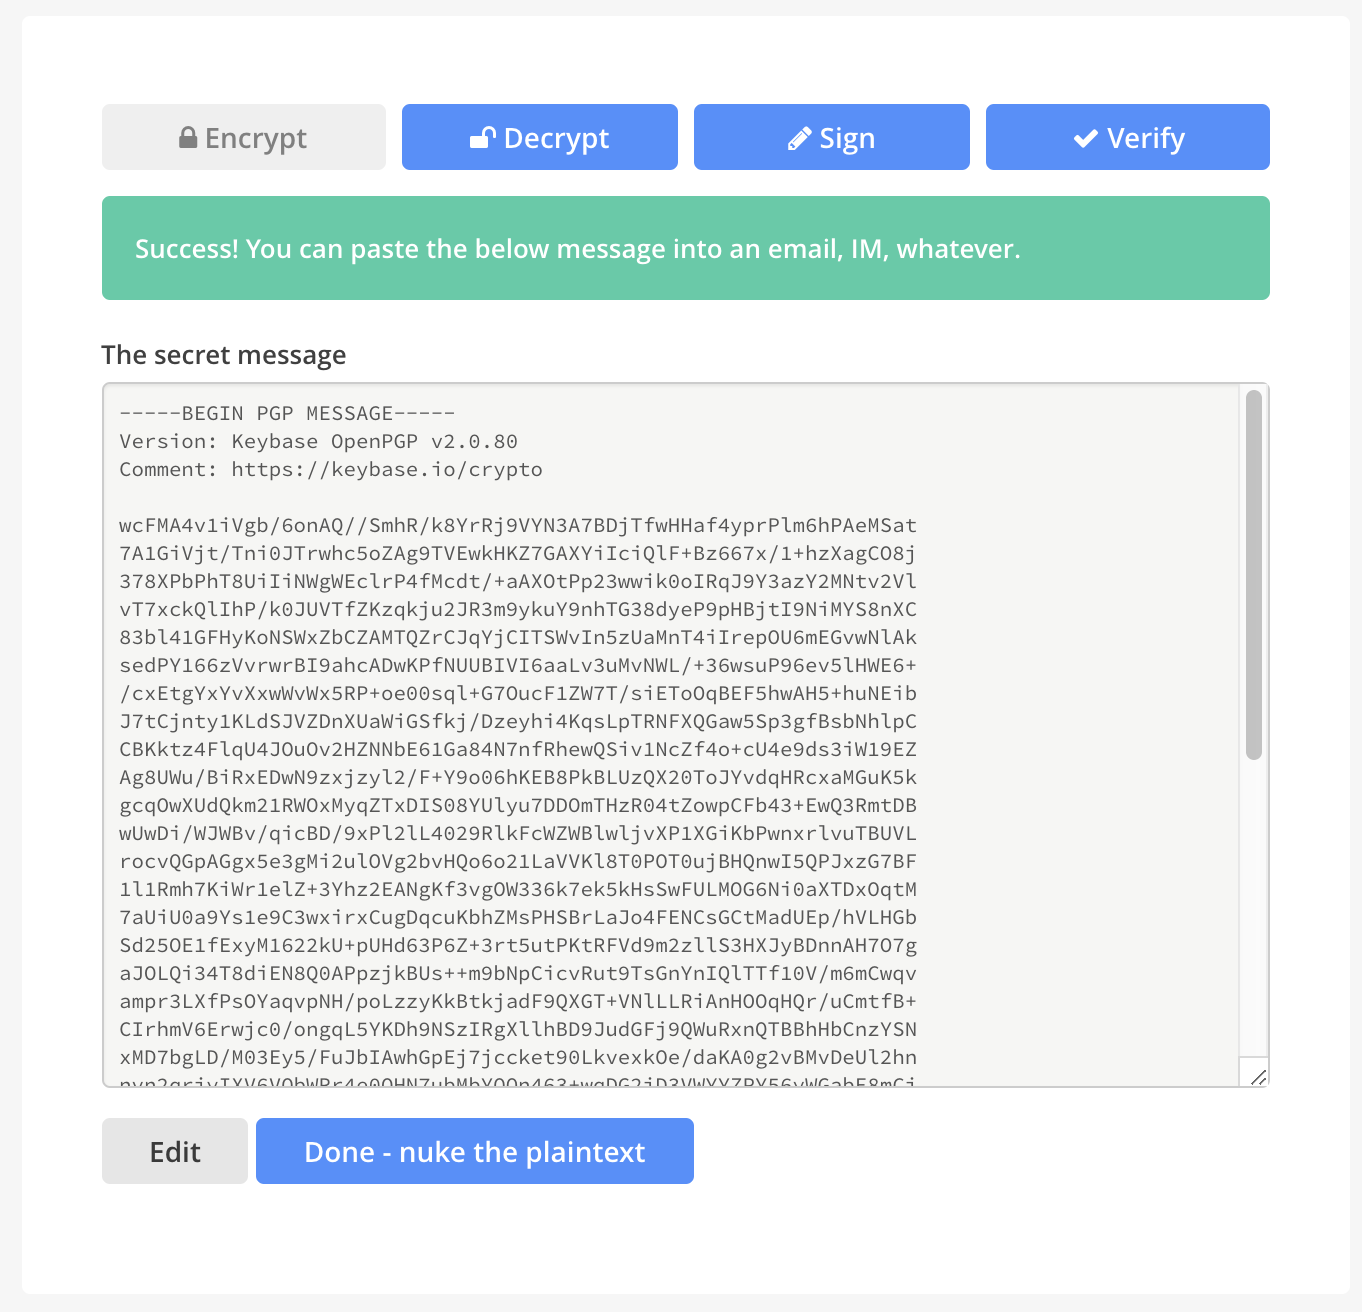
In Recipient enter the Keybase username of the recipient. Write your message to encrypt in the Message to encrypt field. Check the box to sign the message and enter your passphrase in the field below.


Click Sign and encrypt to encrypt the message. Copy the contents of the field titled The secret message into a file, and upload to an FTP server for the receiver to access:

2. Export the private key (Message receiver)Copy
In your account area, find the line item with a key icon. Click on the square icon next to edit and then click on Export my private key from Keybase:

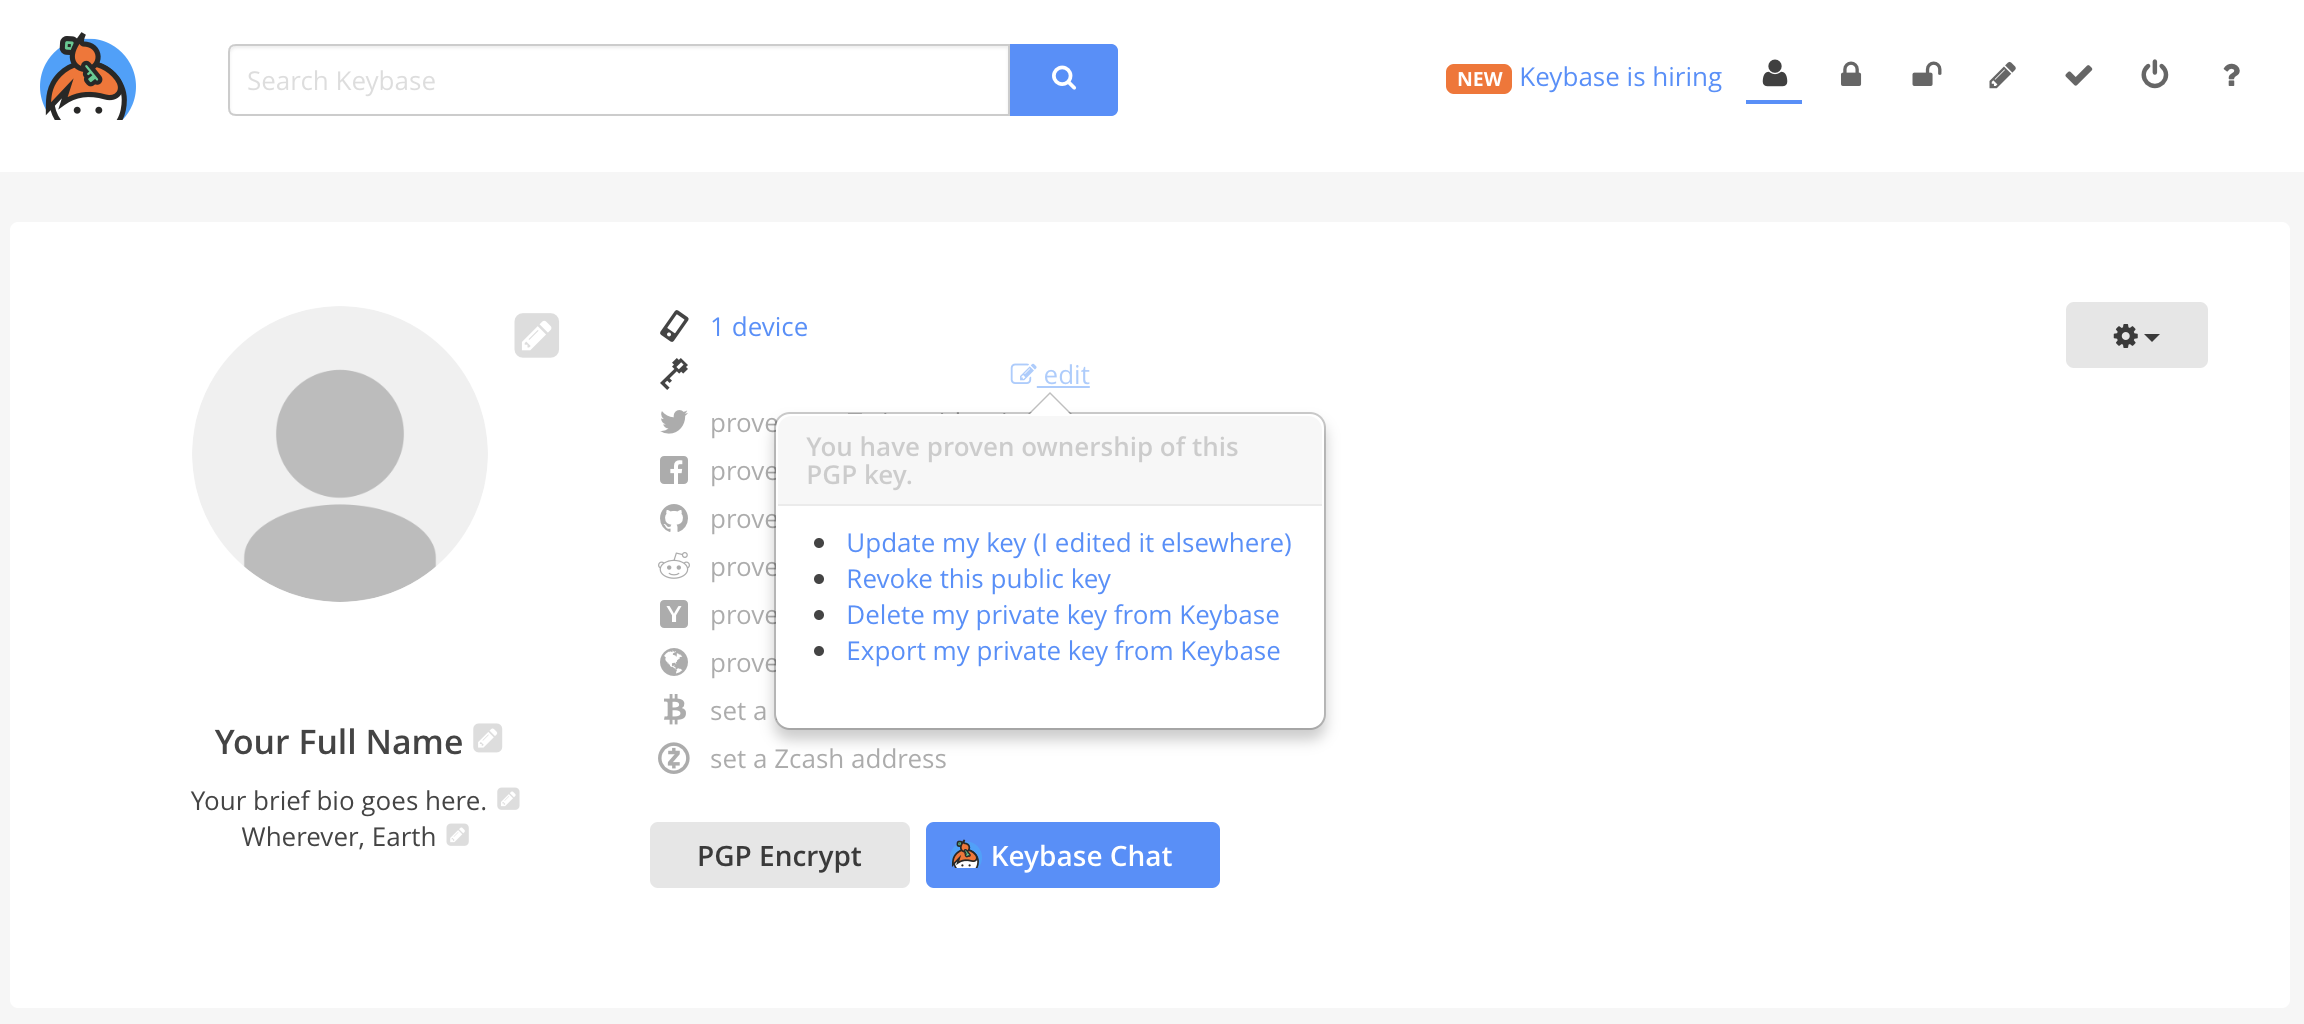
Enter your passphrase when prompted, then click Export.
Copy and paste the contents of the key into the Private key field in the authentication in Tray, and fill in the passphrase for your Keybase account.
3. Build a Tray workflow to decrypt the file (Message receiver)Copy
Create a workflow with a Manual trigger, an FTP Client, and an Encryption helper.
You will need to click on 'New Authentication' for the FTP client and enter your auth details for the server:


The FTP step should be set to the FTP/SFTP download operation, and the file path must be entered.
For entering your public and private keys as authentication in the Encryption Helper, please see step 6 in Example 1 above.
Then, for the Encryption Helper, the 'connector snake' can be used to grab the JSON path ($.steps.ftp-client-1.file) for the file downloaded via FTP. The Operation is set to 'PGP Decrypt file':


The decrypted file will be output as a file to be used. As with the previous example, you can check that the operation was successful with the 'Debug' tab.
PGP decrypt fileCopy
The PGP decrypt file operation decrypts a file encrypted using the PGP algorithm. It requires an authentication to be created with at least a Private key, and optionally a Passphrase.
File: (required) Allows you to specify the file object to be decrypted. If the file is encrypted using the PGP algorithm (file ending .pgp) then the file may not be armored. For instance non-armored files generated by the PGP command line tool are accepted. However for files generated by other algorithms such as GPG, the file must be armored (ending in .asc or .pgp).
PGP encrypt fileCopy
The PGP encrypt file operation encrypts a file using the PGP algorithm. It requires an authentication to be created with at least a Public key.
File: (required) Allows you to specify the file object to be encrypted.