
Crypto Helpers 4.3
Cryptographic Crypto helpers.
OverviewCopy
The Crypto Helpers provide cryptographic functionality that includes a set of wrappers for OpenSSL's hash, HMAC and sign functions as well as nodes crypto private encrypt/public decrypt and cipher IV operations.
AuthenticationCopy
When using the crypto-helpers connector, the first thing you will need to do is go to your Tray.io account page, and select the workflow you wish to work on. Once in the workflow builder itself, search and drag the crypto-helpers connector from the connectors panel (on the left hand side) onto your workflow.
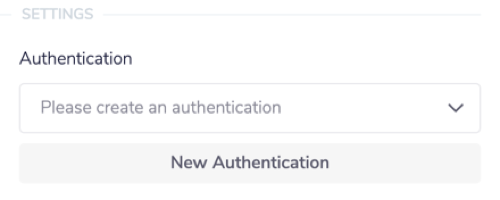
With the new crypto-helpers connector step highlighted, in the properties panel on the right, click on 'New Authentication' which is located under the 'Settings' heading.

This will result in a Tray.io authentication pop-up window. The first page will ask you to name your authentication, and state which type of authentication you wish to create ('Personal' or 'Organisational').
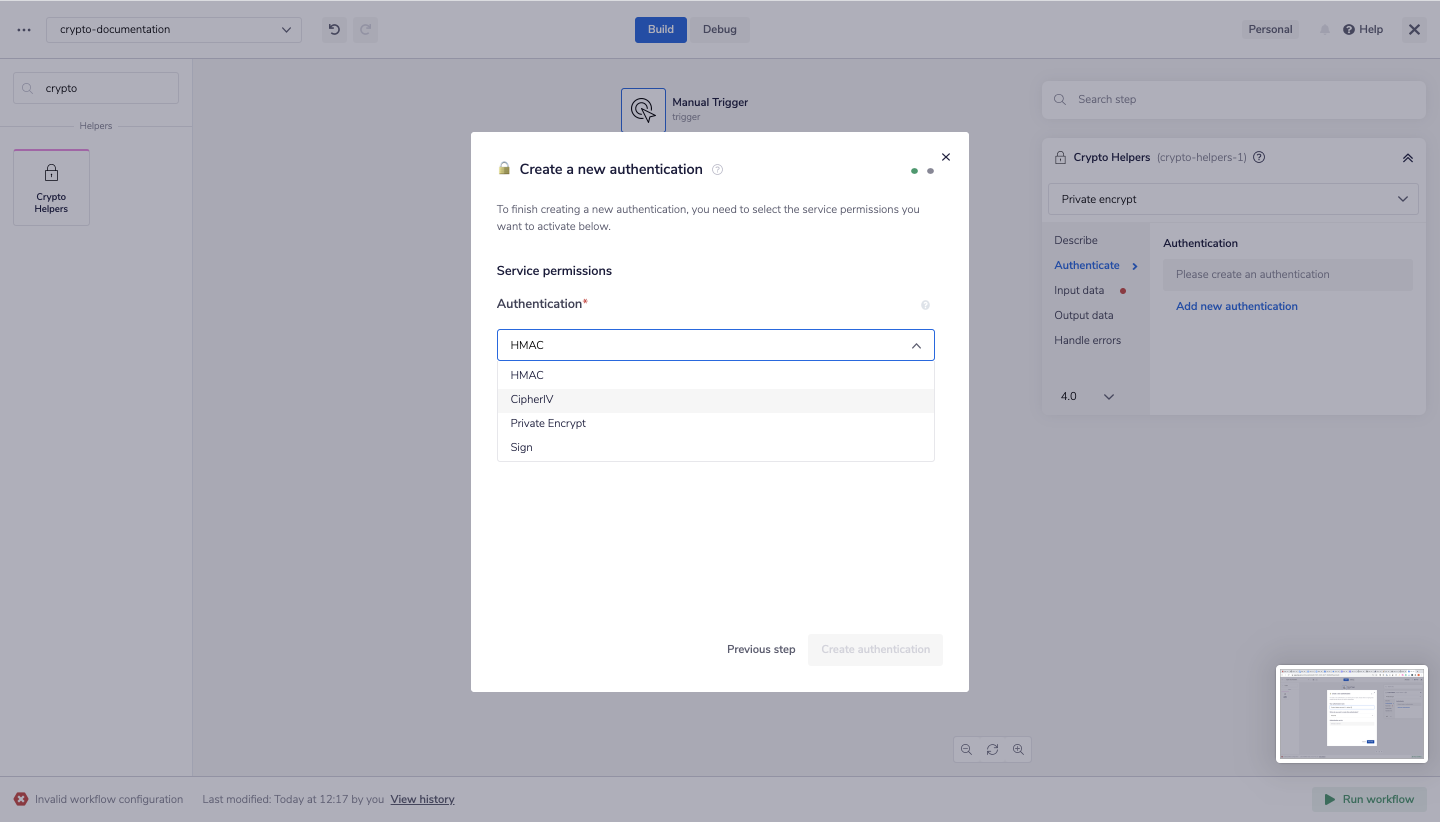
The next page is where the crypto helpers authentication diverges from standard connectors. To keep your data sensitive you'll need to make an authentication for each set of operations that you wish to use. The private encrypt for example takes a pem key where as the sign can take an RSA etc. When entering a private key be sure to include the -----BEGIN PRIVATE KEY----- header and -----END PRIVATE KEY----- footer.

Once you have added these fields to your Tray.io authentication popup window, click on the 'Create authentication' button. Go back to your settings authentication field (within the workflow builder properties panel), and select the recently added authentication from the dropdown options now available.
Your connector authentication setup should now be complete.
Notes on operation usageCopy
Certain operations within the crypto helpers are easier than others. The Cipher IV operation is particularly complex and is recommended that you are aware of how many bytes each algorithm requires to create a cipher as well as how hashing a value before hand can change this. The most common route is to sign a 16 digit passphrase using sha256 converting this to 32 bytes and feed this in to a cipher 256 algorithm.
ECB algorithms require no IV and the field should therefore be left blank.
Tips on using Crypto HelpersCopy
Cryptographic operations can be complex, as such workflows using the Crypto Helpers may require extra thought before implementing.
As can be seen in the JWT example below, generating a token can require 8 or more steps, which can make workflows quite lengthy. The following suggestions may help with your use case.
Some of the object helper steps in the JWT example below could be compressed even further into a script step; ie. adding key/value pairs and 'stringifying' could be done in a script step rather than the object helper steps shown here. Using scripts is a general method for compressing WFs.
Note: Tray does not currently support importing libraries in script steps. However we do have 3 built-in JS libraries - Lodash, Mout, and Moment.
Note: Tray does not create or maintain custom scripts for customers.
Whether or not you compress the token generation process with scripts, it may be wise to make use of callable WFs and triggers for readability and modularity.
Depending on the application you are using as a text editor, sometimes there are hidden characters encoded in your text. This is common when copy/pasting text from a browser, an email, a word document, etc. When you paste that text into Tray, encoded characters may appear decoded in our debug logs even though you cannot see them in your pasted text. For example, this may happen with the new line character (/n). When an application decodes /n in a string of text, it creates a new line visually. These invisible characters can cause issues with the crypto helper.
To sanitize your text, you can paste into your text editor Integration Development Environment (IDE) such as VSCode or Sublime. Then copy the text from your IDE and paste it into Tray.
Example - Generating JWT tokenCopy
In this example we will build a workflow to generate a JWT token. This kind of token consists of three parts which are concatenated with full stops; a header, a claim set and a signature which is computed from the header and claim set (see https://jwt.io/introduction/ for documentation and examples).
The first step is to instantiate the header and claim set as objects, with their values set to stringified objects.
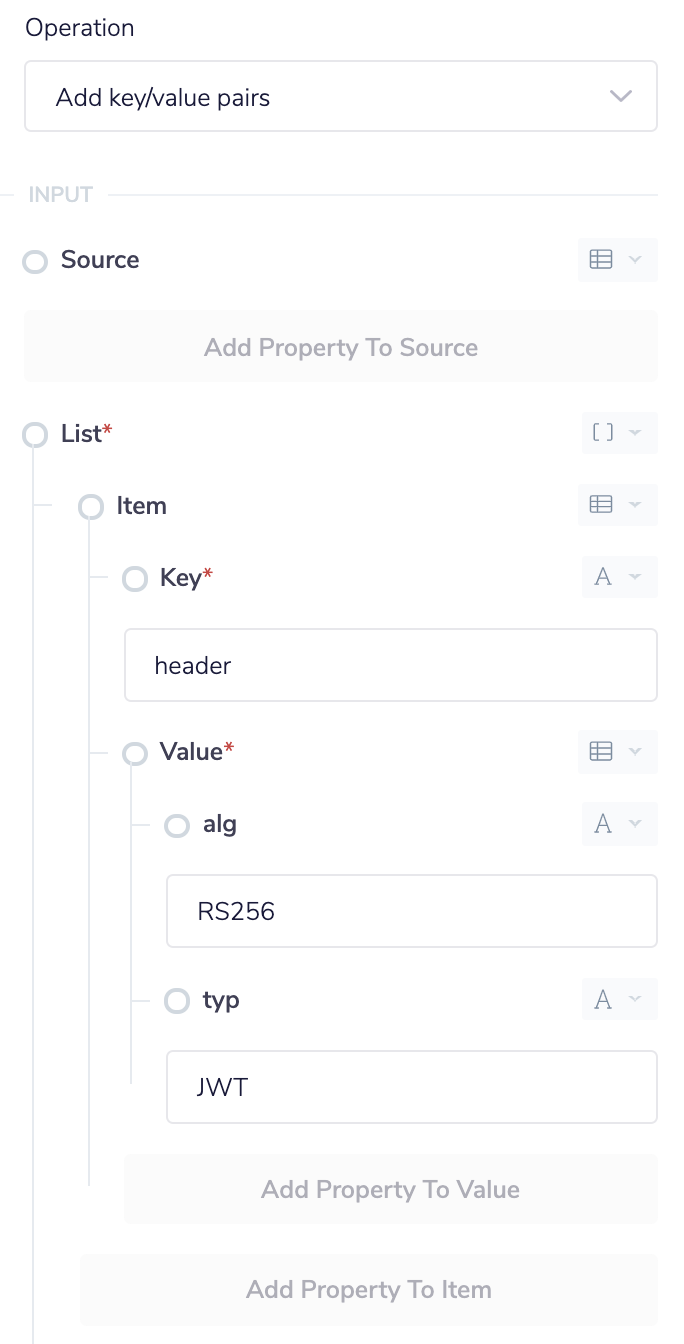
Create a new workflow with a Manual Trigger, and add a step from the Object Helpers connector, with the operation set to Add key/value pairs. Add two items to the List field, one with the Key "header", set the type of its Value to an object, with properties alg set to value "RS256", and typ with value "JWT". The second item will have a Key of "claimSet", with properties sub set to "1234567890", name set to "John Doe", and "admin" set to true:

The output of this step will be an object with 2 properties: header and claimSet. We now need to stringify their values. We add another step from the Object Helpers connector, with the operation set to JSON Stringify. The JSON field will be a jsonPath with value $.steps.object-helpers-1.result.header to reference the header from the previous step. Duplicate this step and change the value in the duplicated step to $.steps.object-helpers-1.result.claimSet.
You can also use the Script > Execute Script operation to perform these three steps in one, by specifying the Script as
1exports.step = (input) => ({2header: JSON.stringify({3alg: 'RS256',4typ: 'JWT'5}),6claimSet: JSON.stringify({7sub: '1234567890',8name: 'John Doe',9admin: true10})11});
The output will then be an object with header and claimSet properties.
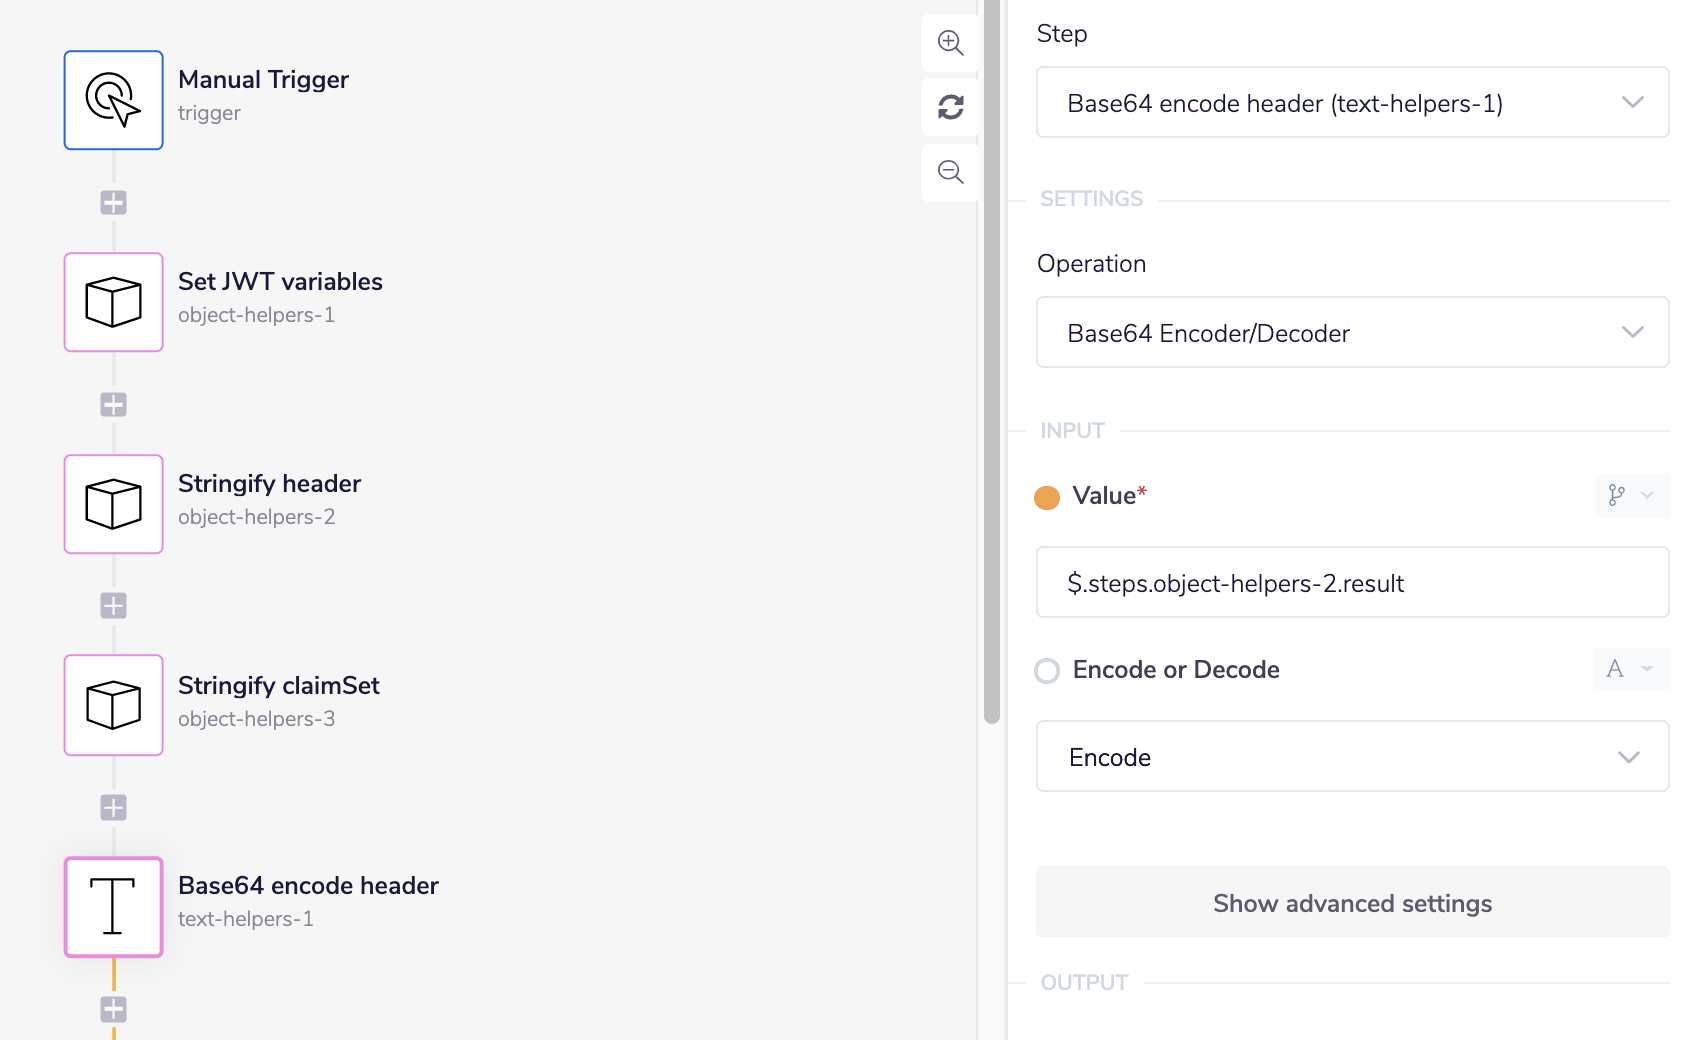
We then need to Base64Url encode these strings. The first step is to add a step from the Text Helpers, with the operation set to Base64 Encoder/Decoder. Set the Value field to a jsonPath referencing the header from the script step: $.steps.object-helpers-2.result, and set the Operation as "Encode". Duplicate this step, and change the jsonPath in the Value field of the duplicated step to $.steps.object-helpers-3.result to reference the claim set from the script.

To make this base64 encoding URL-safe we need to perform a series of replacements on the strings we just generated. We could use the Text Helpers > Replace operation multiple times to achieve this, however it is simpler to use one script step to perform the replacements.
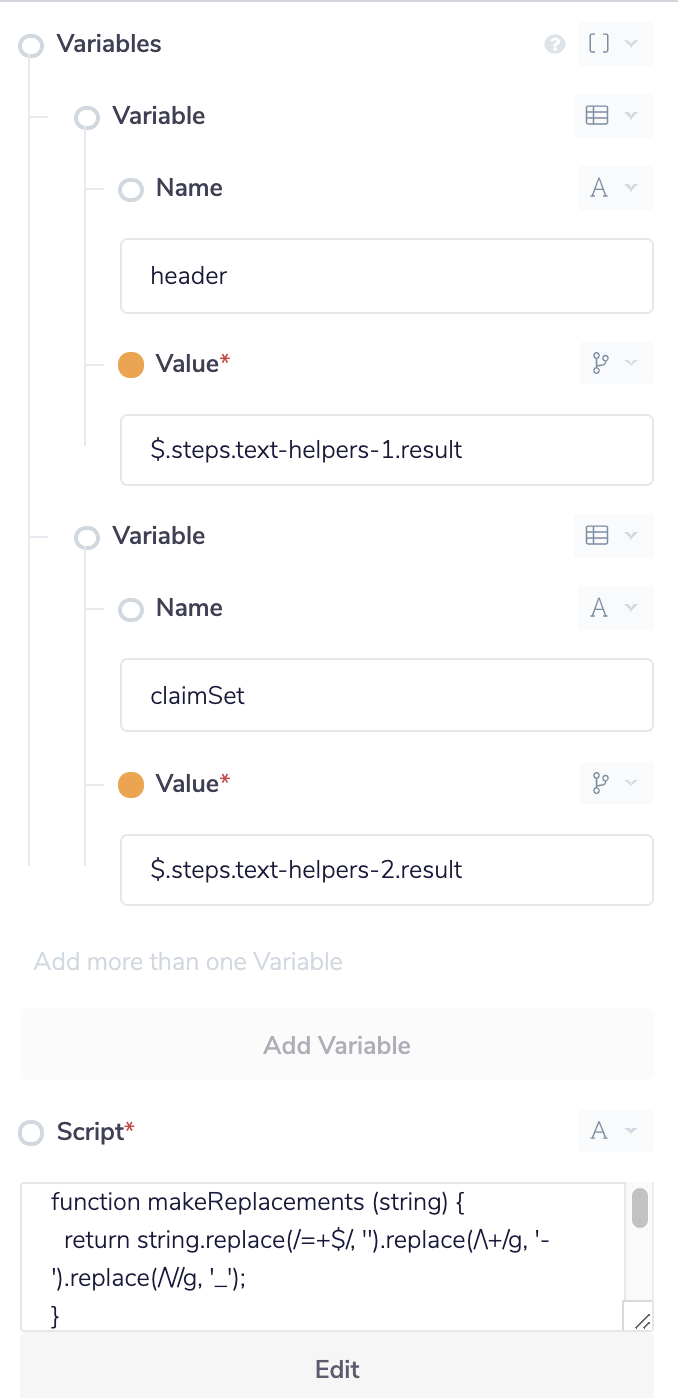
We add another script step, this time setting variables. Set the Name of the first variable to "header", and set the Value to the jsonPath $.steps.text-helpers-1.result, referencing the base64-encoded header. Add a second variable with the Name set to "claimSet", and the Value set to jsonPath $.steps.text-helpers-2.result. In this script we wish to remove any "=" values at the end of the string, replace "+" with "-" and replace "/" with "_". Inside the Script variable we define a function "makeReplacements":
1function makeReplacements (string) {2return string.replace(/=+$/, '').replace(/\+/g, '-').replace(/\//g, '_');3}
This function will take a string argument and perform three different replacements before returning the string.
We then need to define the payload we wish to return in this Script step. We wish to return an object with the transformed header and claim set, so we write:
1exports.step = (input) => ({2header: makeReplacements(input.header),3claimSet: makeReplacements(input.claimSet)4});
where makeReplacements references the function we have created, input.header references the "header" variable we defined in the input panel, and input.claimSet references the "claimSet" variable we defined in the input panel.
The whole script will look like:
1function makeReplacements (string) {2return string.replace(/=+$/, '').replace(/\+/g, '-').replace(/\//g, '_');3}45exports.step = (input) => ({6header: makeReplacements(input.header),7claimSet: makeReplacements(input.claimSet)8});
and the input panel should look like:

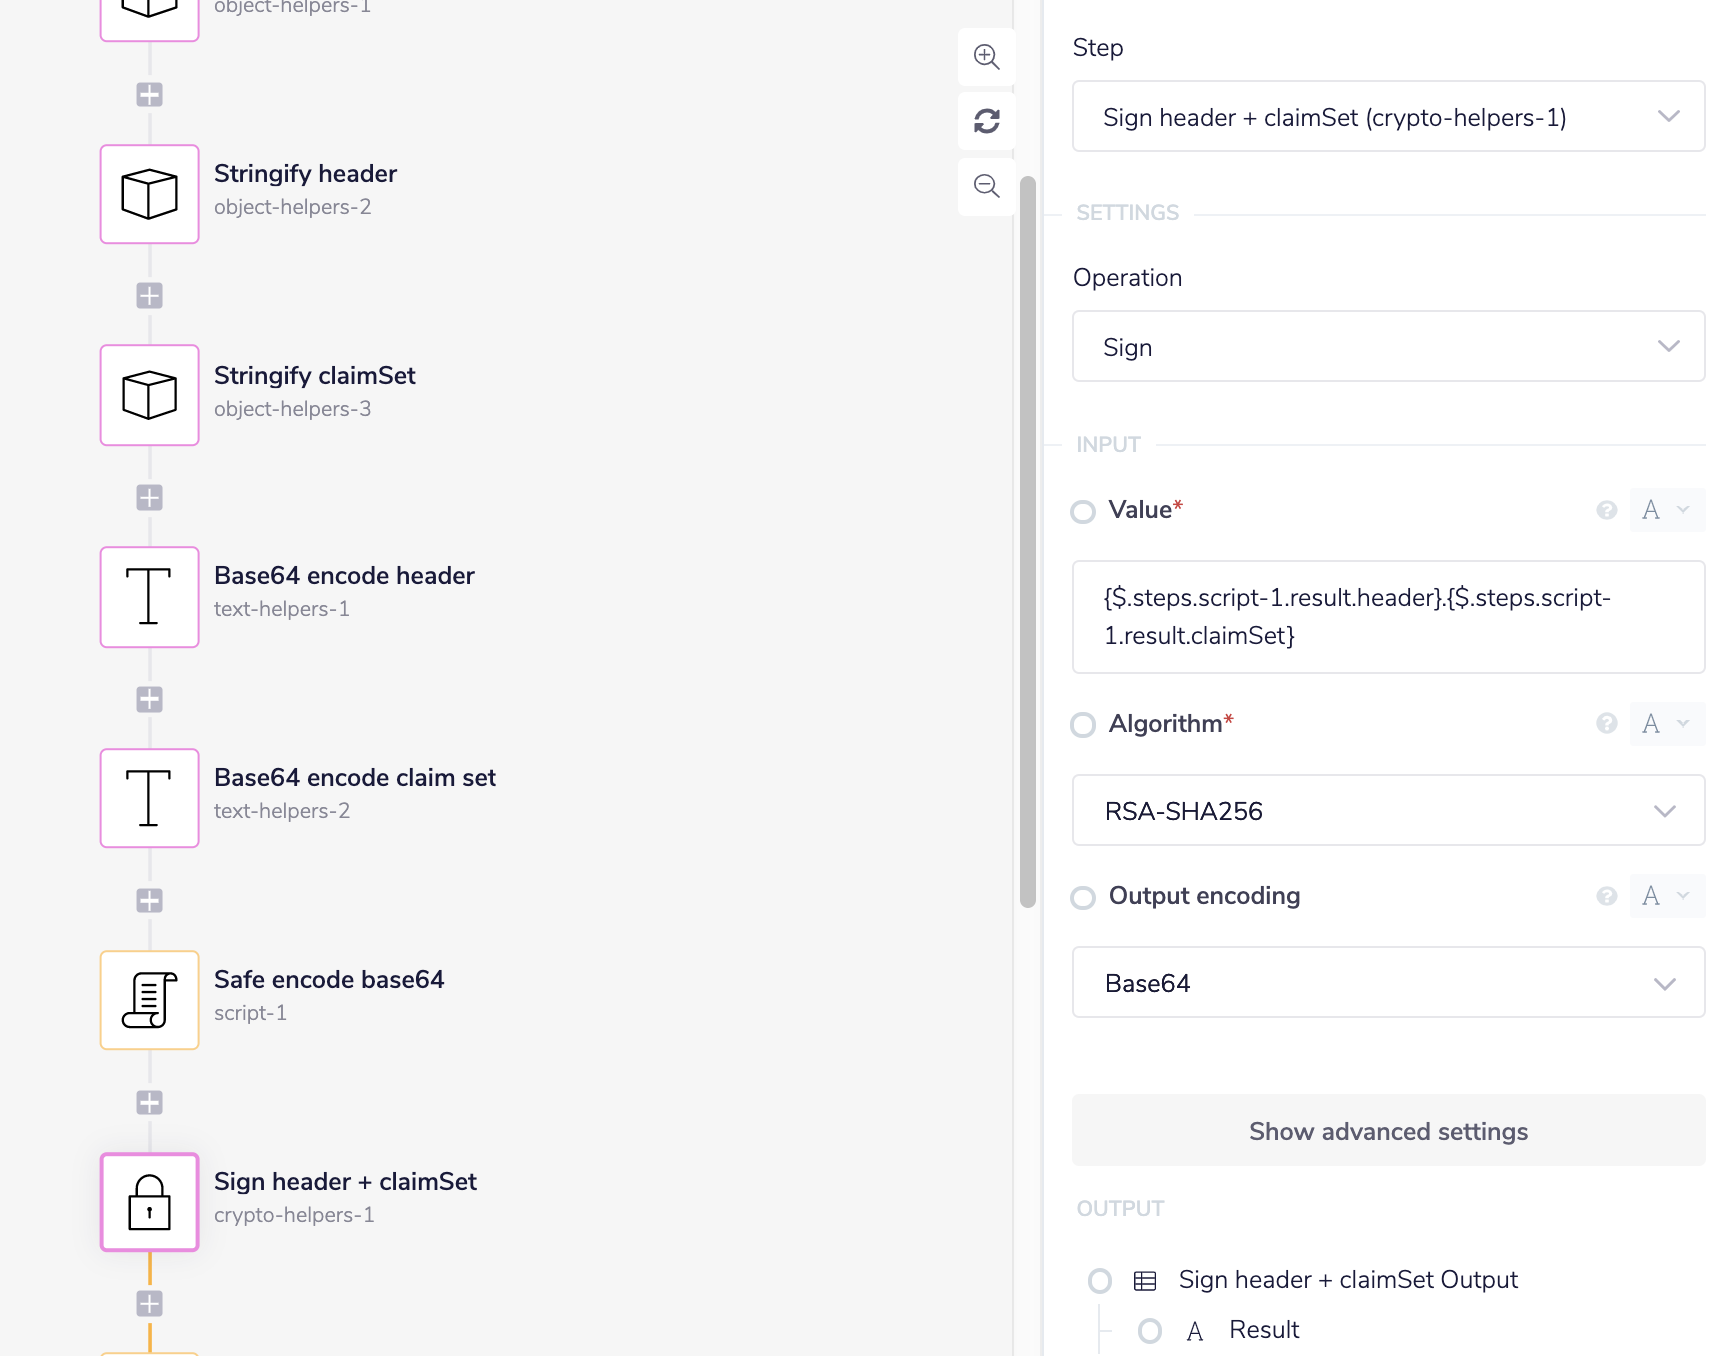
At this stage we have generated the first two parts of the JWT, the encoded header and claim set. We now sign these using a private key to generate the signature of our JWT. In the header part of our JWT we have specified that the JWT is signed using the RSA-SHA256 algorithm, hence we need to use the Sign operation of the Crypto Helpers. We add a step from this operation, with the Value set to a string with value {$.steps.script-1.result.header}.{$.steps.script-1.result.claimSet}. Note we have used the interpolation method of referencing jsonPaths inside a string here, in order to concatenate the header and claim set. Set the Algorithm to "RSA-SHA256", and the Output encoding to "Base64", so that our signature is the correct format for JWT:

We need to now perform the same replacement on this string as previously to make the base64 encoding URL-safe. Duplicate step script-2, move the duplicated step to be after step crypto-helpers-1. We now only set one variable, with Name "signature" and Value jsonPath $.steps.crypto-helpers-1.result. We now amend the script to reference this variable in the payload. In the script, replace the part beginning exports.step = (input) => ... with this code:
1exports.step = (input) => ({2signature: makeReplacements(input.signature)3});
so that we now output the stringified signature.
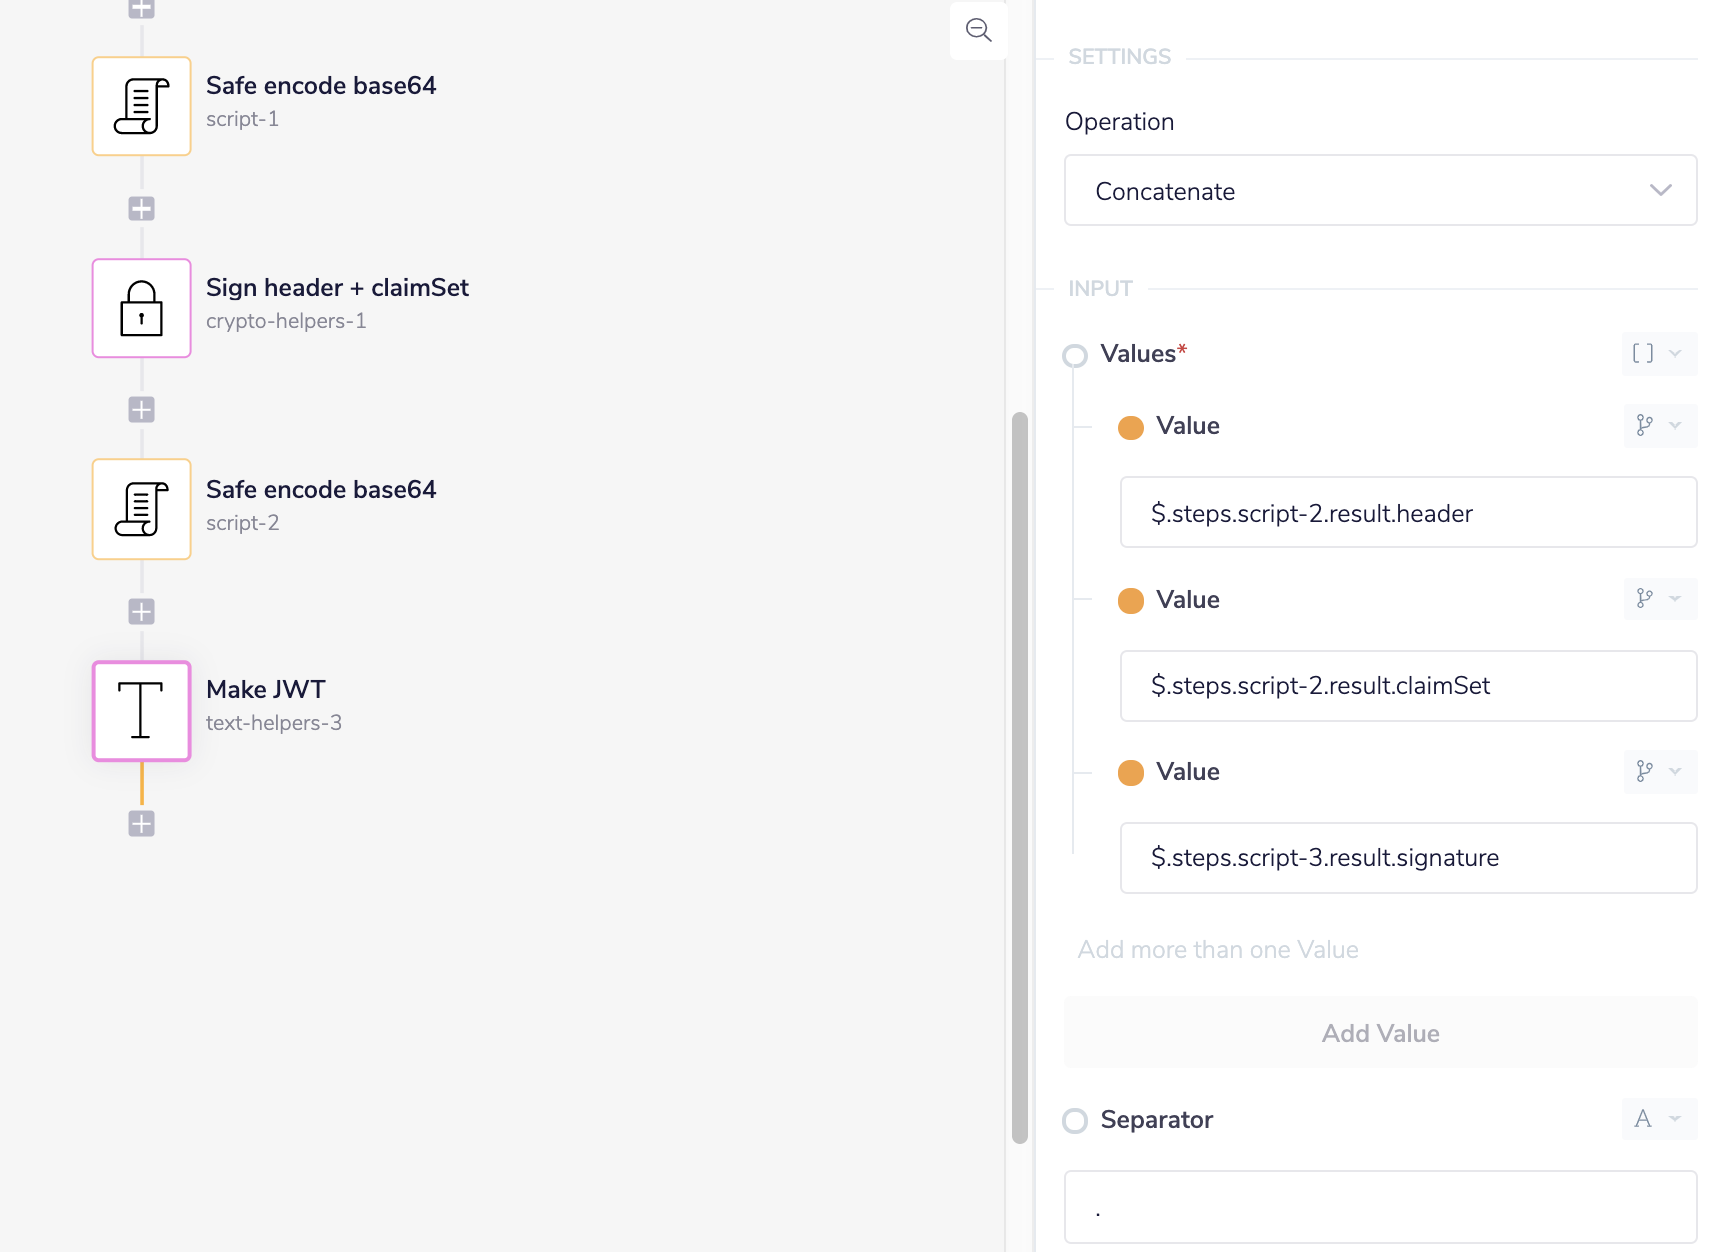
Finally, we now put all three parts together into one JWT. We add a step from the Text Helpers connector with the operation set to Concatenate. We add three values, one for each part of the JWT; first value jsonPath $.steps.script-2.result.header, second value jsonPath $.steps.script-2.result.claimSet, and third value $.steps.script-3.result.signature. Set the value of Separator to a full stop ("."):

The JWT will be available in the "result" property of the text-helpers-3 step. You can then use a JWT verifier such as https://jwt.io/ to check the token.